Want to make your own paper fan? This step-by-step DIY guide shows you how to craft a beautiful flower-shaped fan – perfect for summer days or as a decorative piece.
1
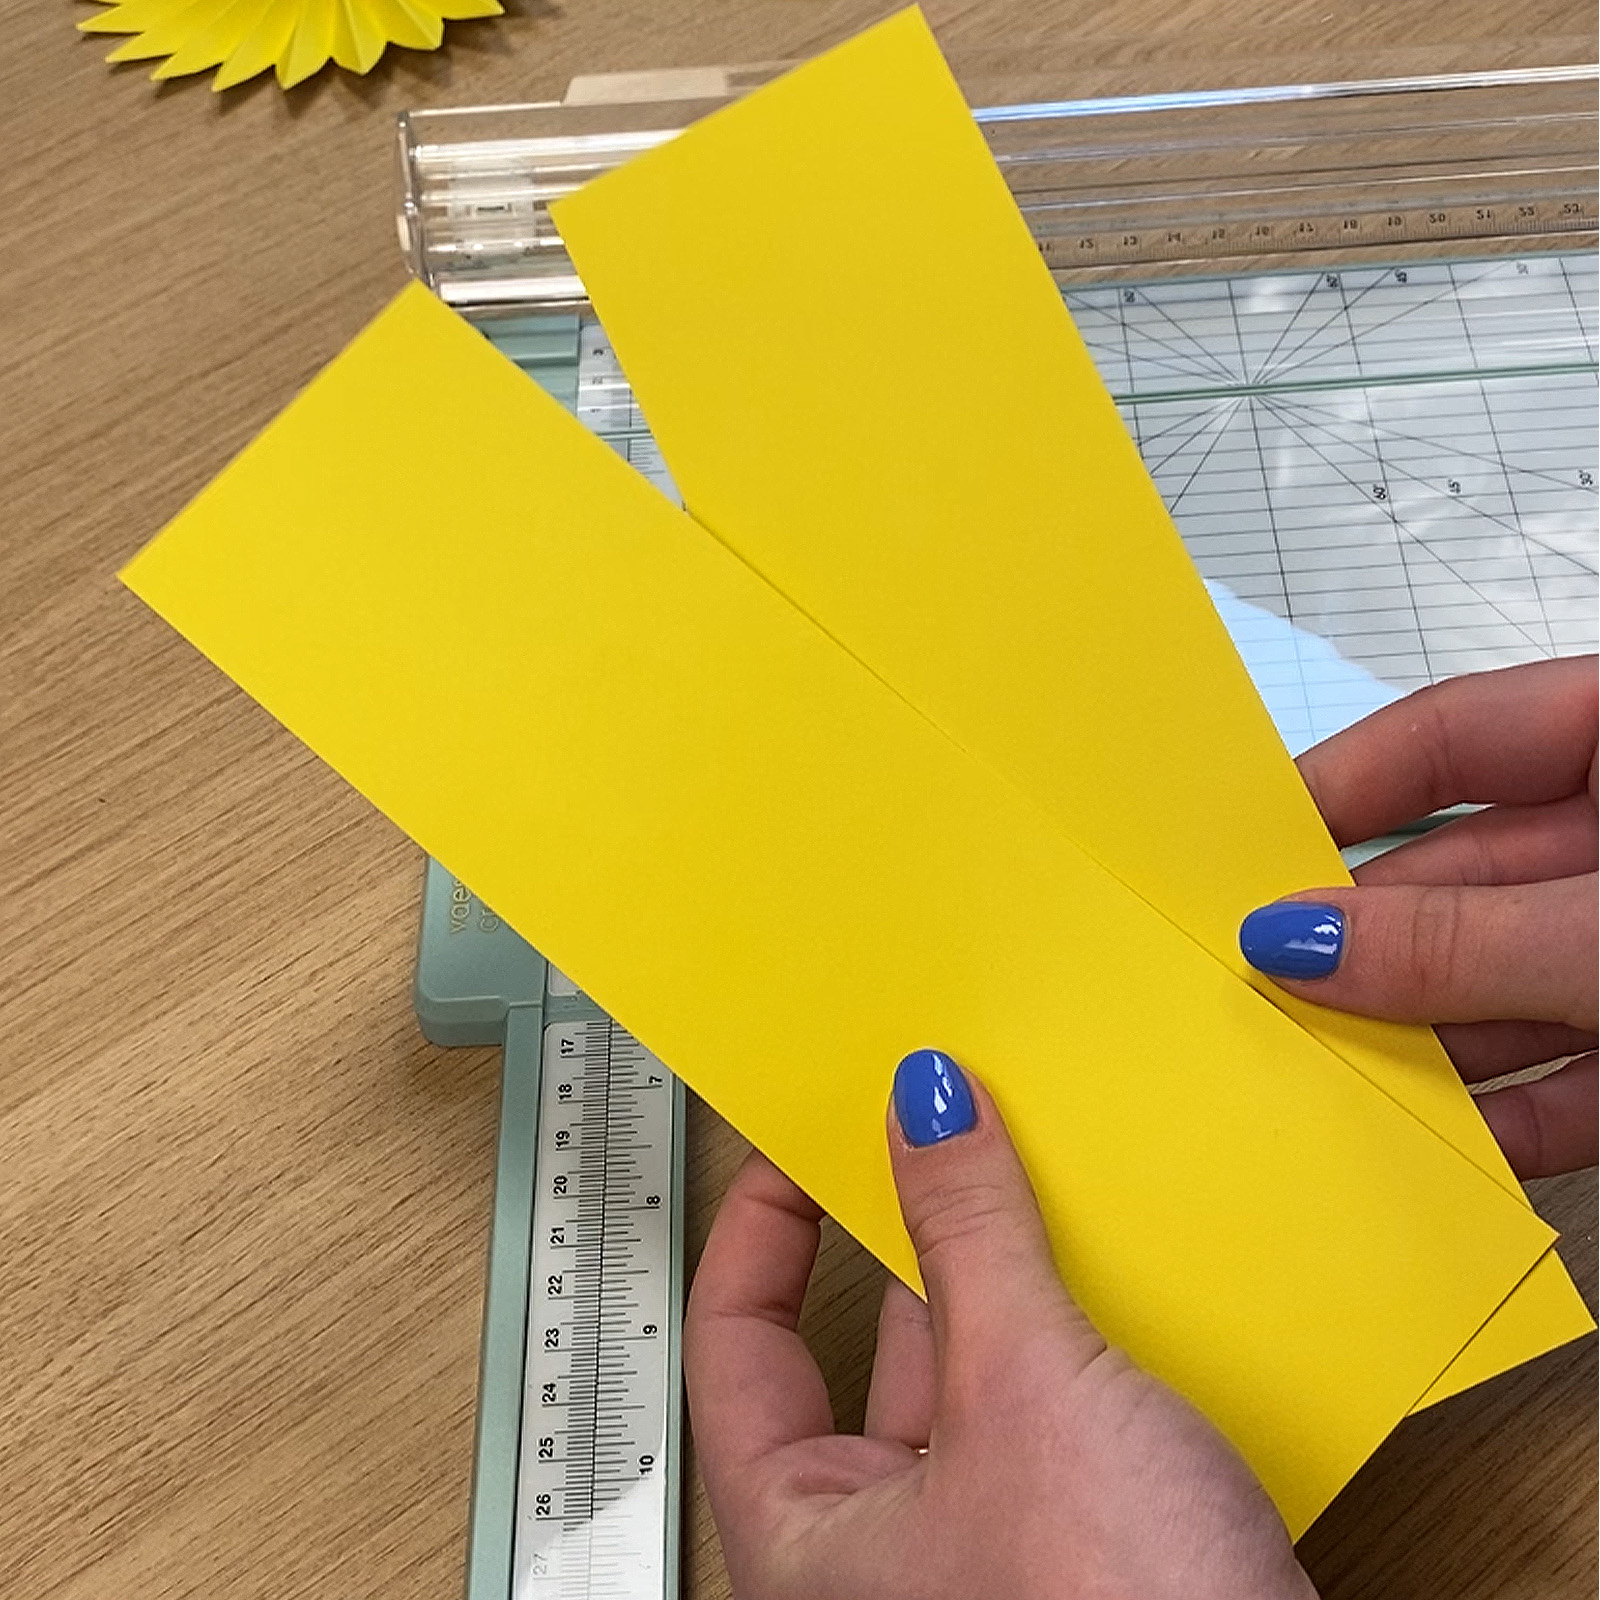
Cut two strips of yellow cardstock, each measuring 9.5 x 2.8 inches (24 x 7 cm).
2
Paint a black stripe along the length of each strip, about one-quarter of the width. Use painter’s tape to achieve a clean edge.
3
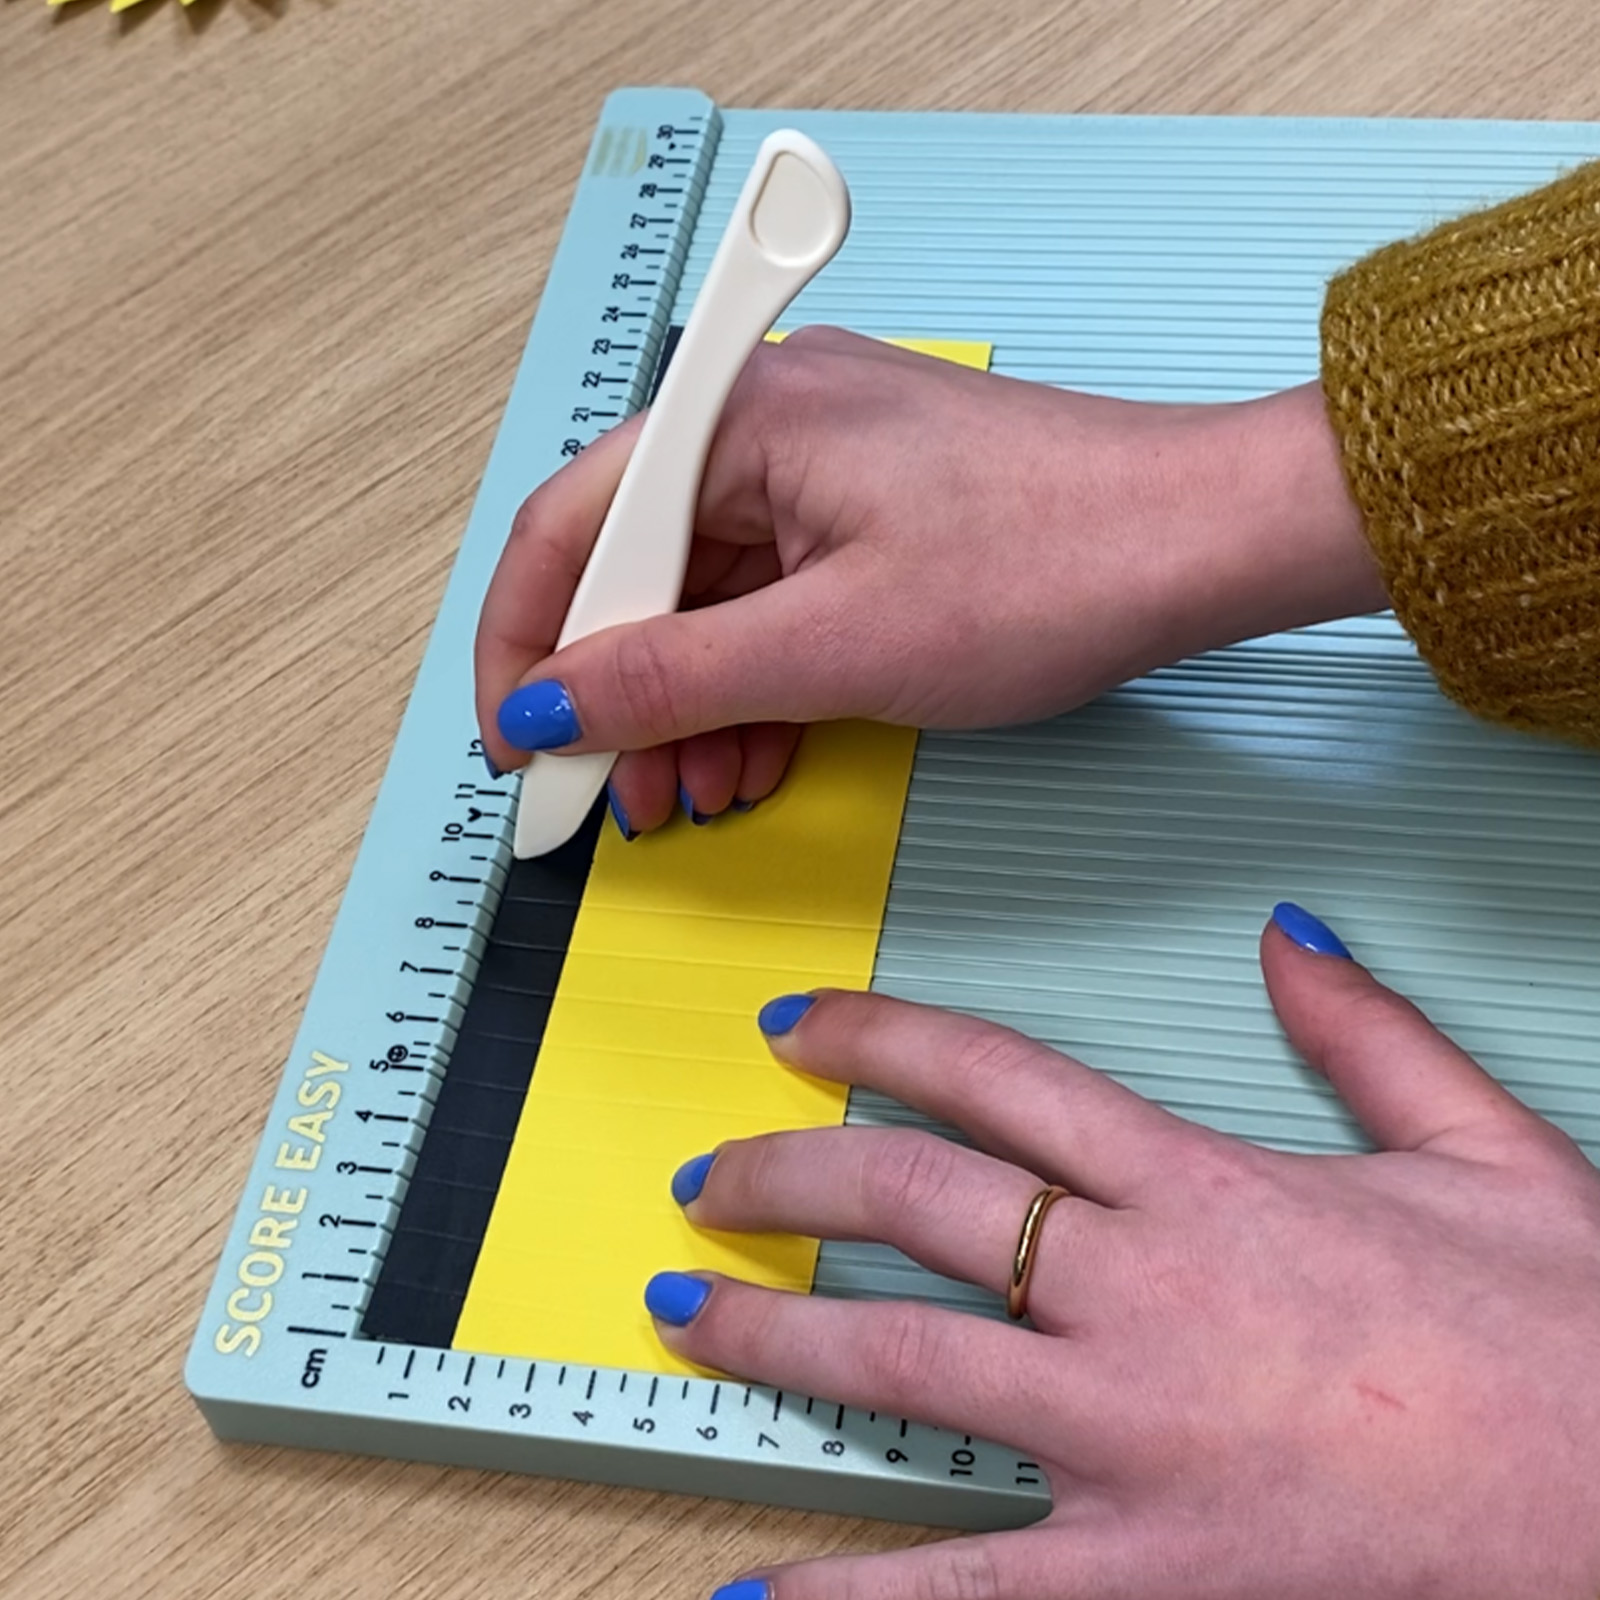
Allow the paint to dry completely. Then, using a scoring tool (like the Score Easy), score a fold line every 0.4 inch (1 cm) across the entire strip to create an accordion effect.
4
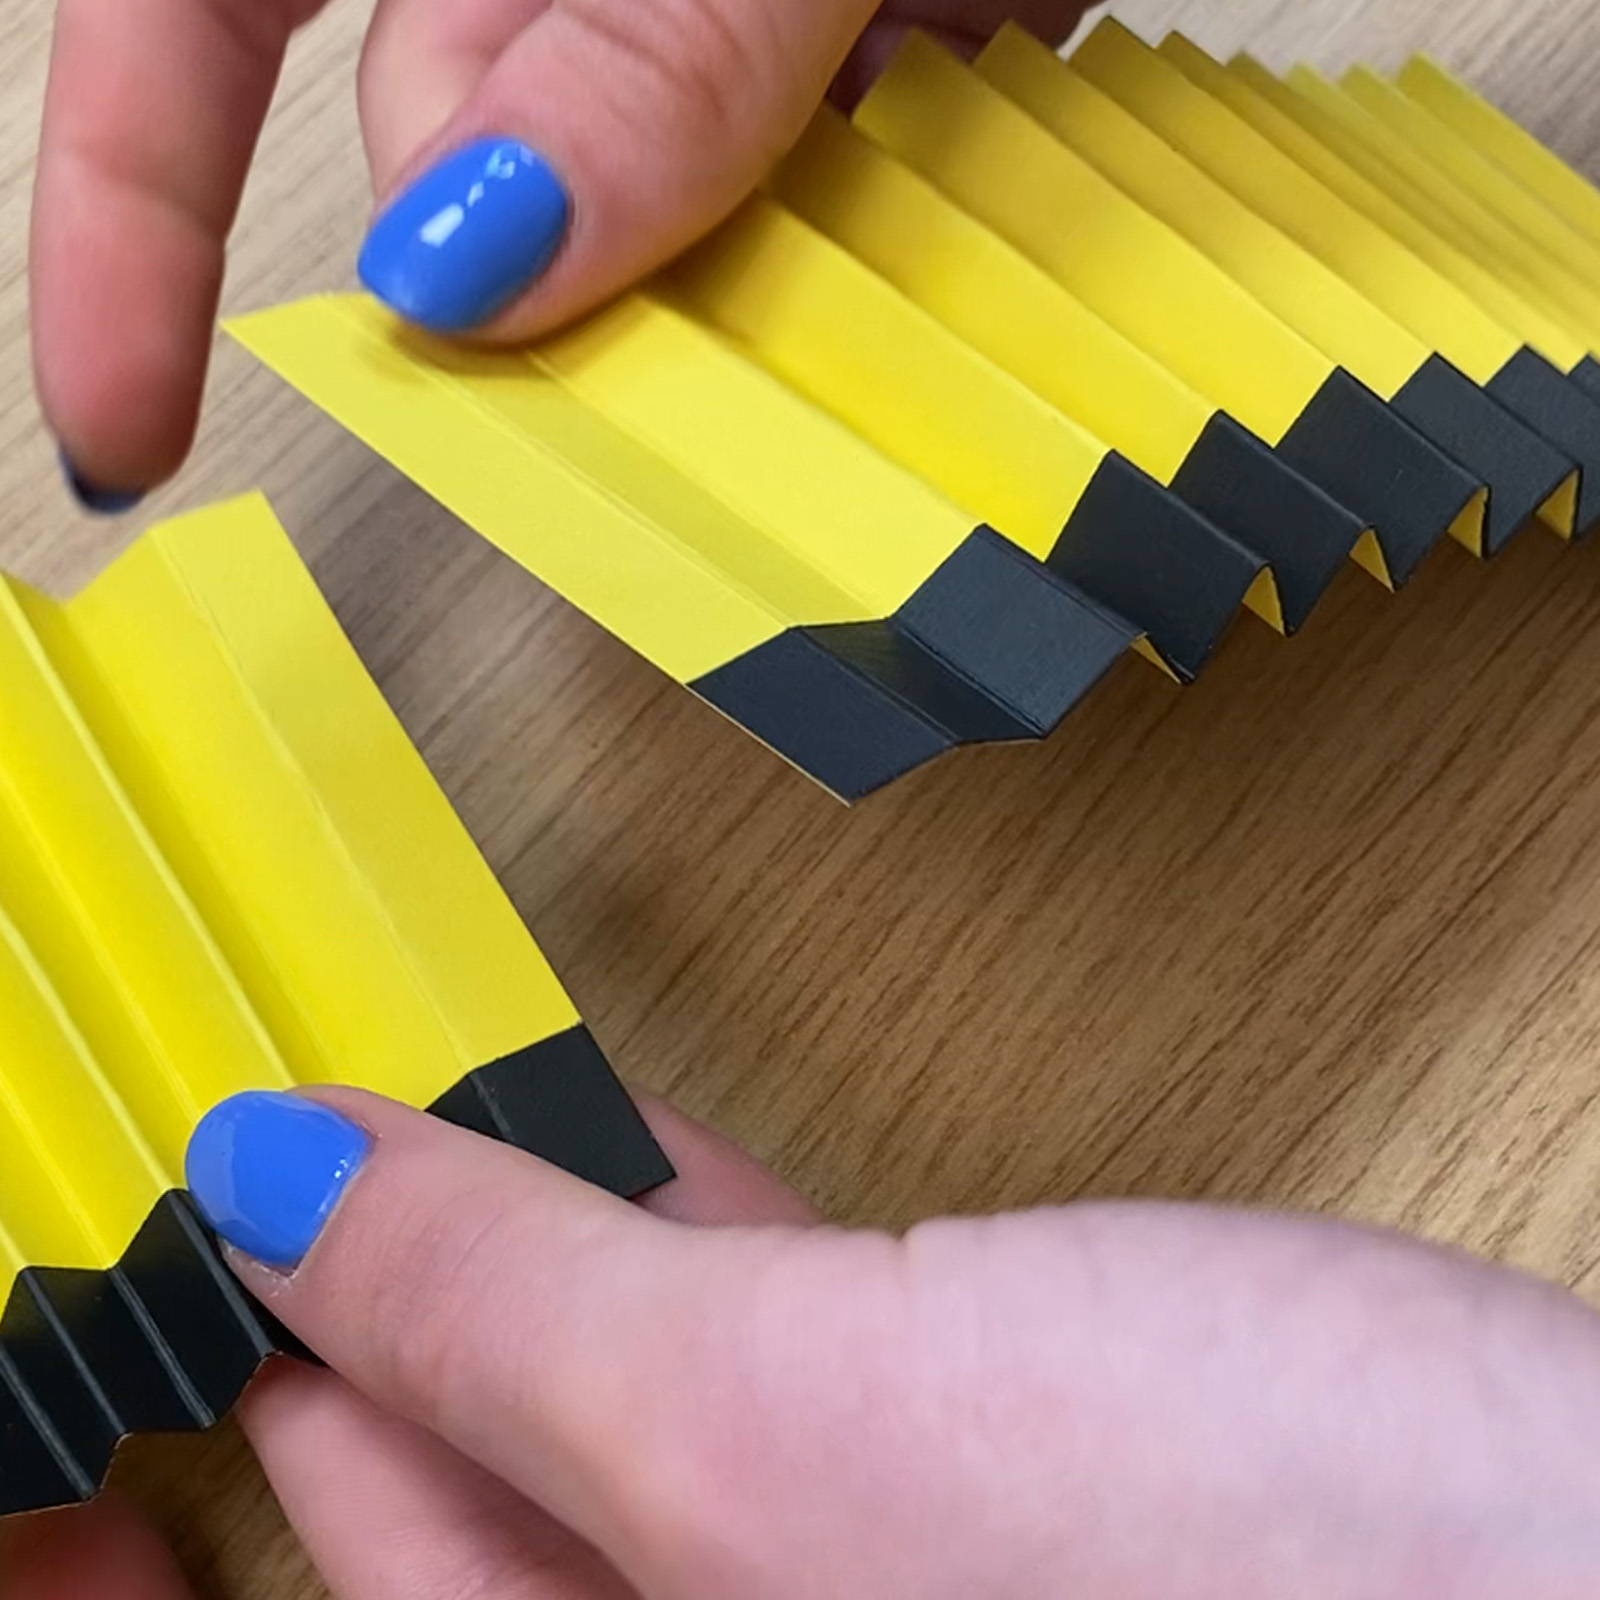
Glue the ends of the two strips together to form one long strip.
5
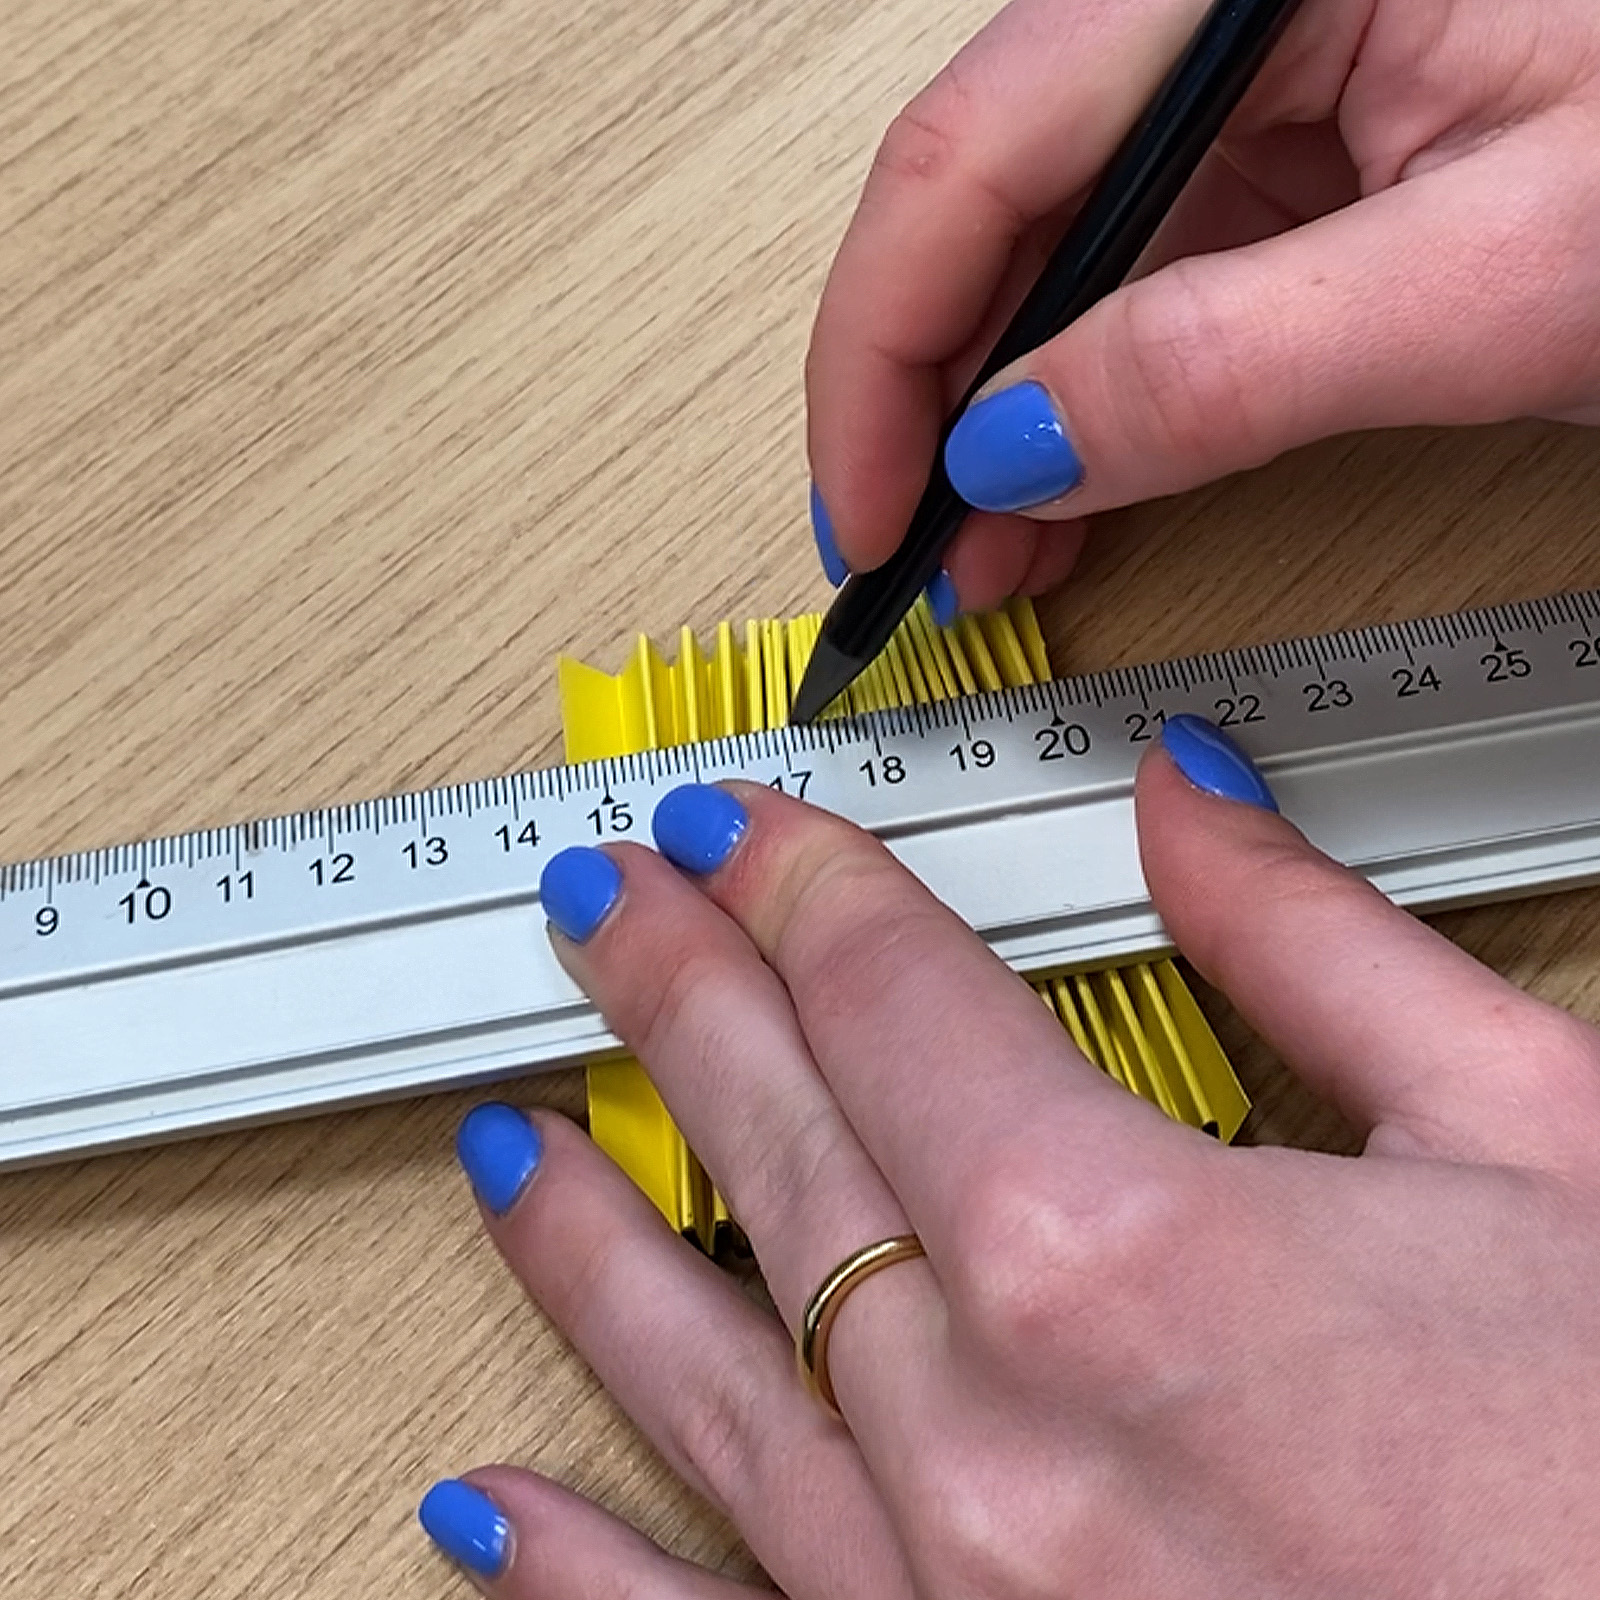
On the back of the strip (on the yellow side), draw a guideline approximately 0.6 inches (1.5 cm) from the edge. This will help with the next step.
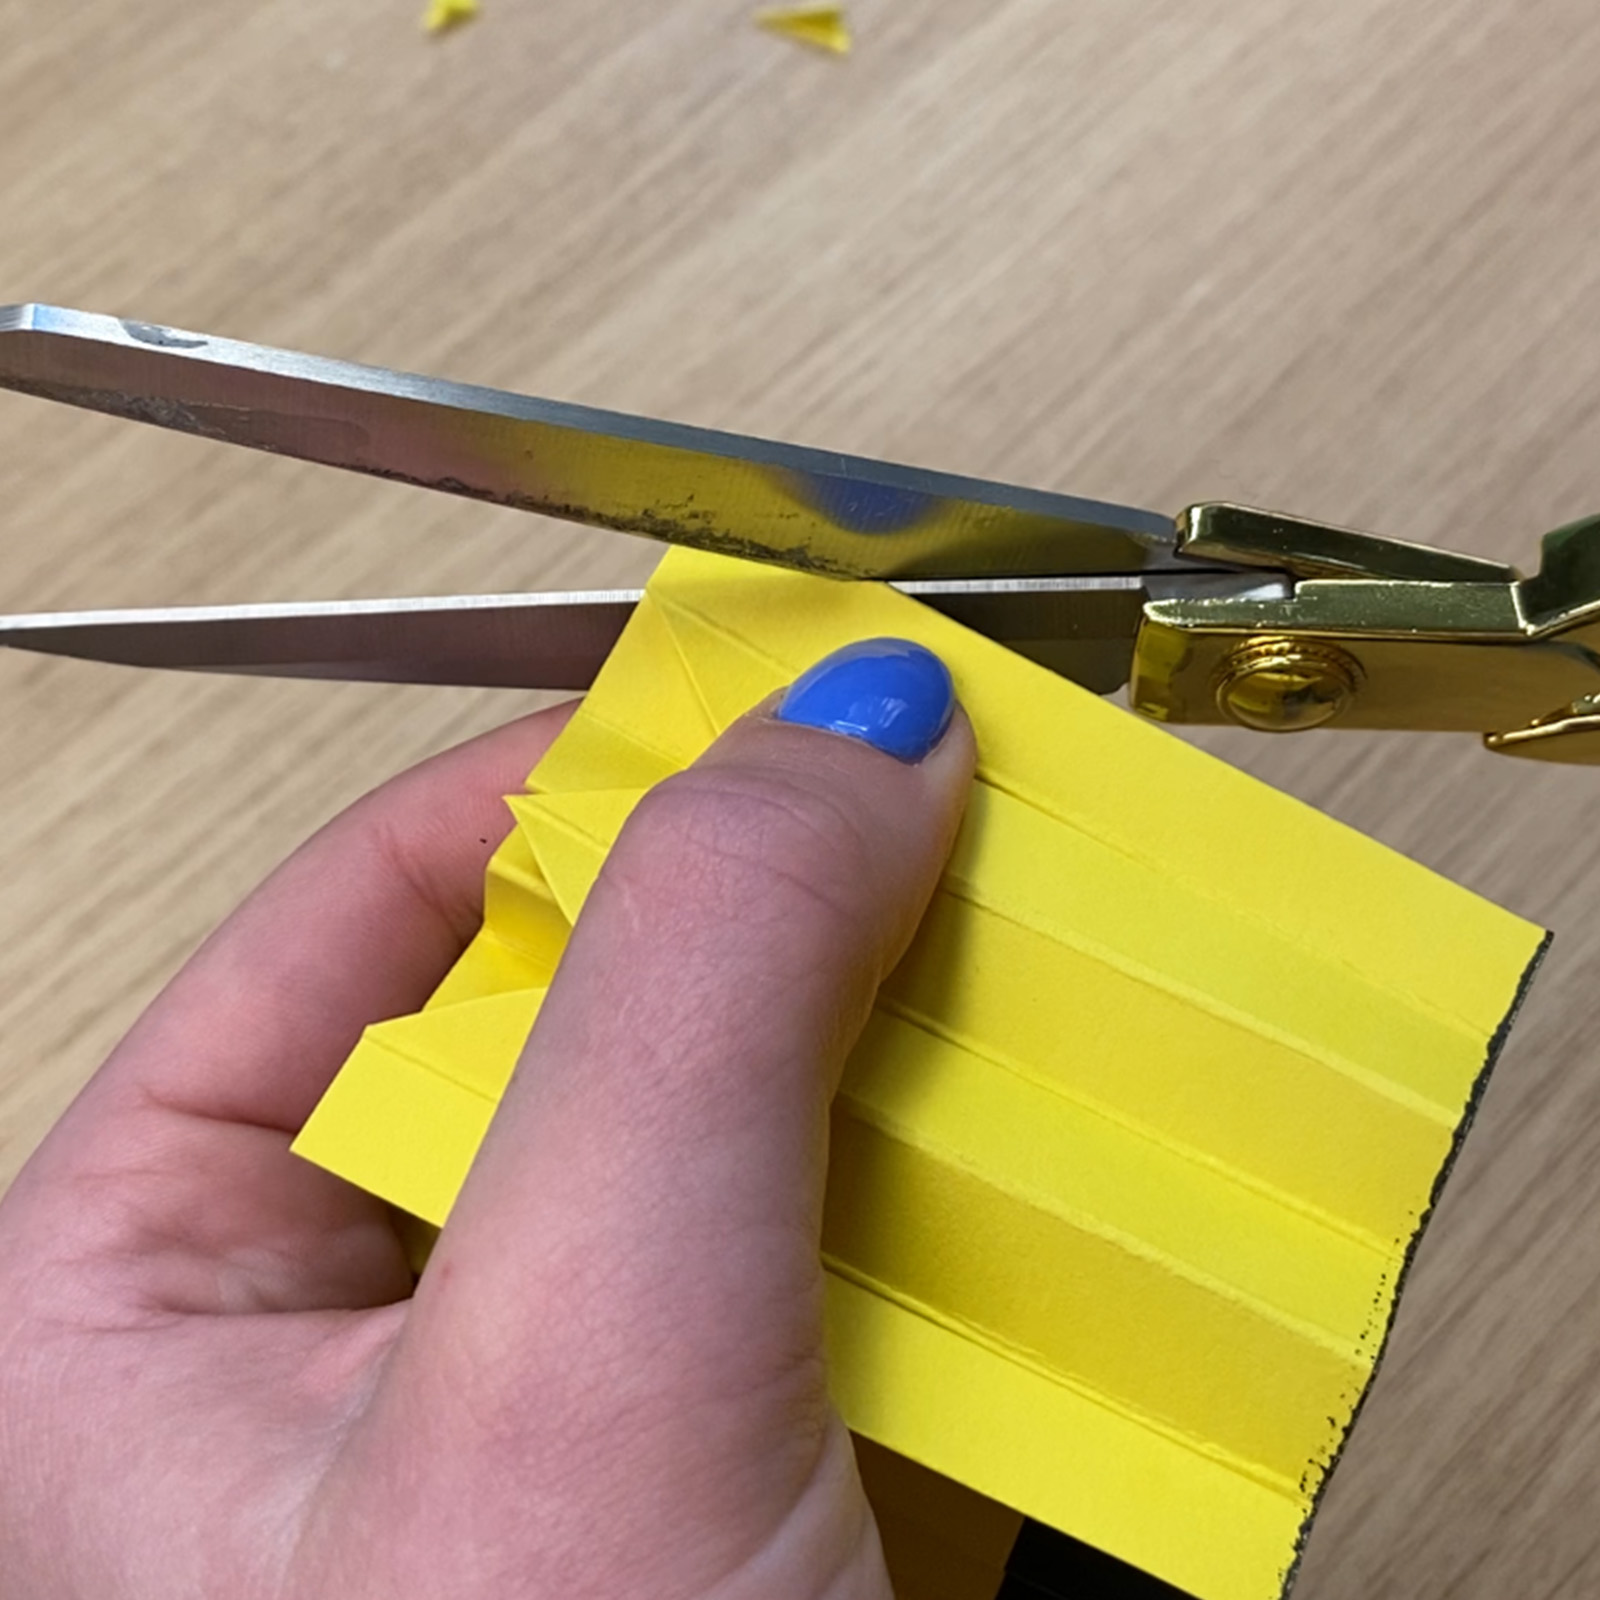
6
Fold each pleat in half and cut one side diagonally, finishing with a rounded edge. This will form petal shapes. Start cutting from the outer edge towards the fold.
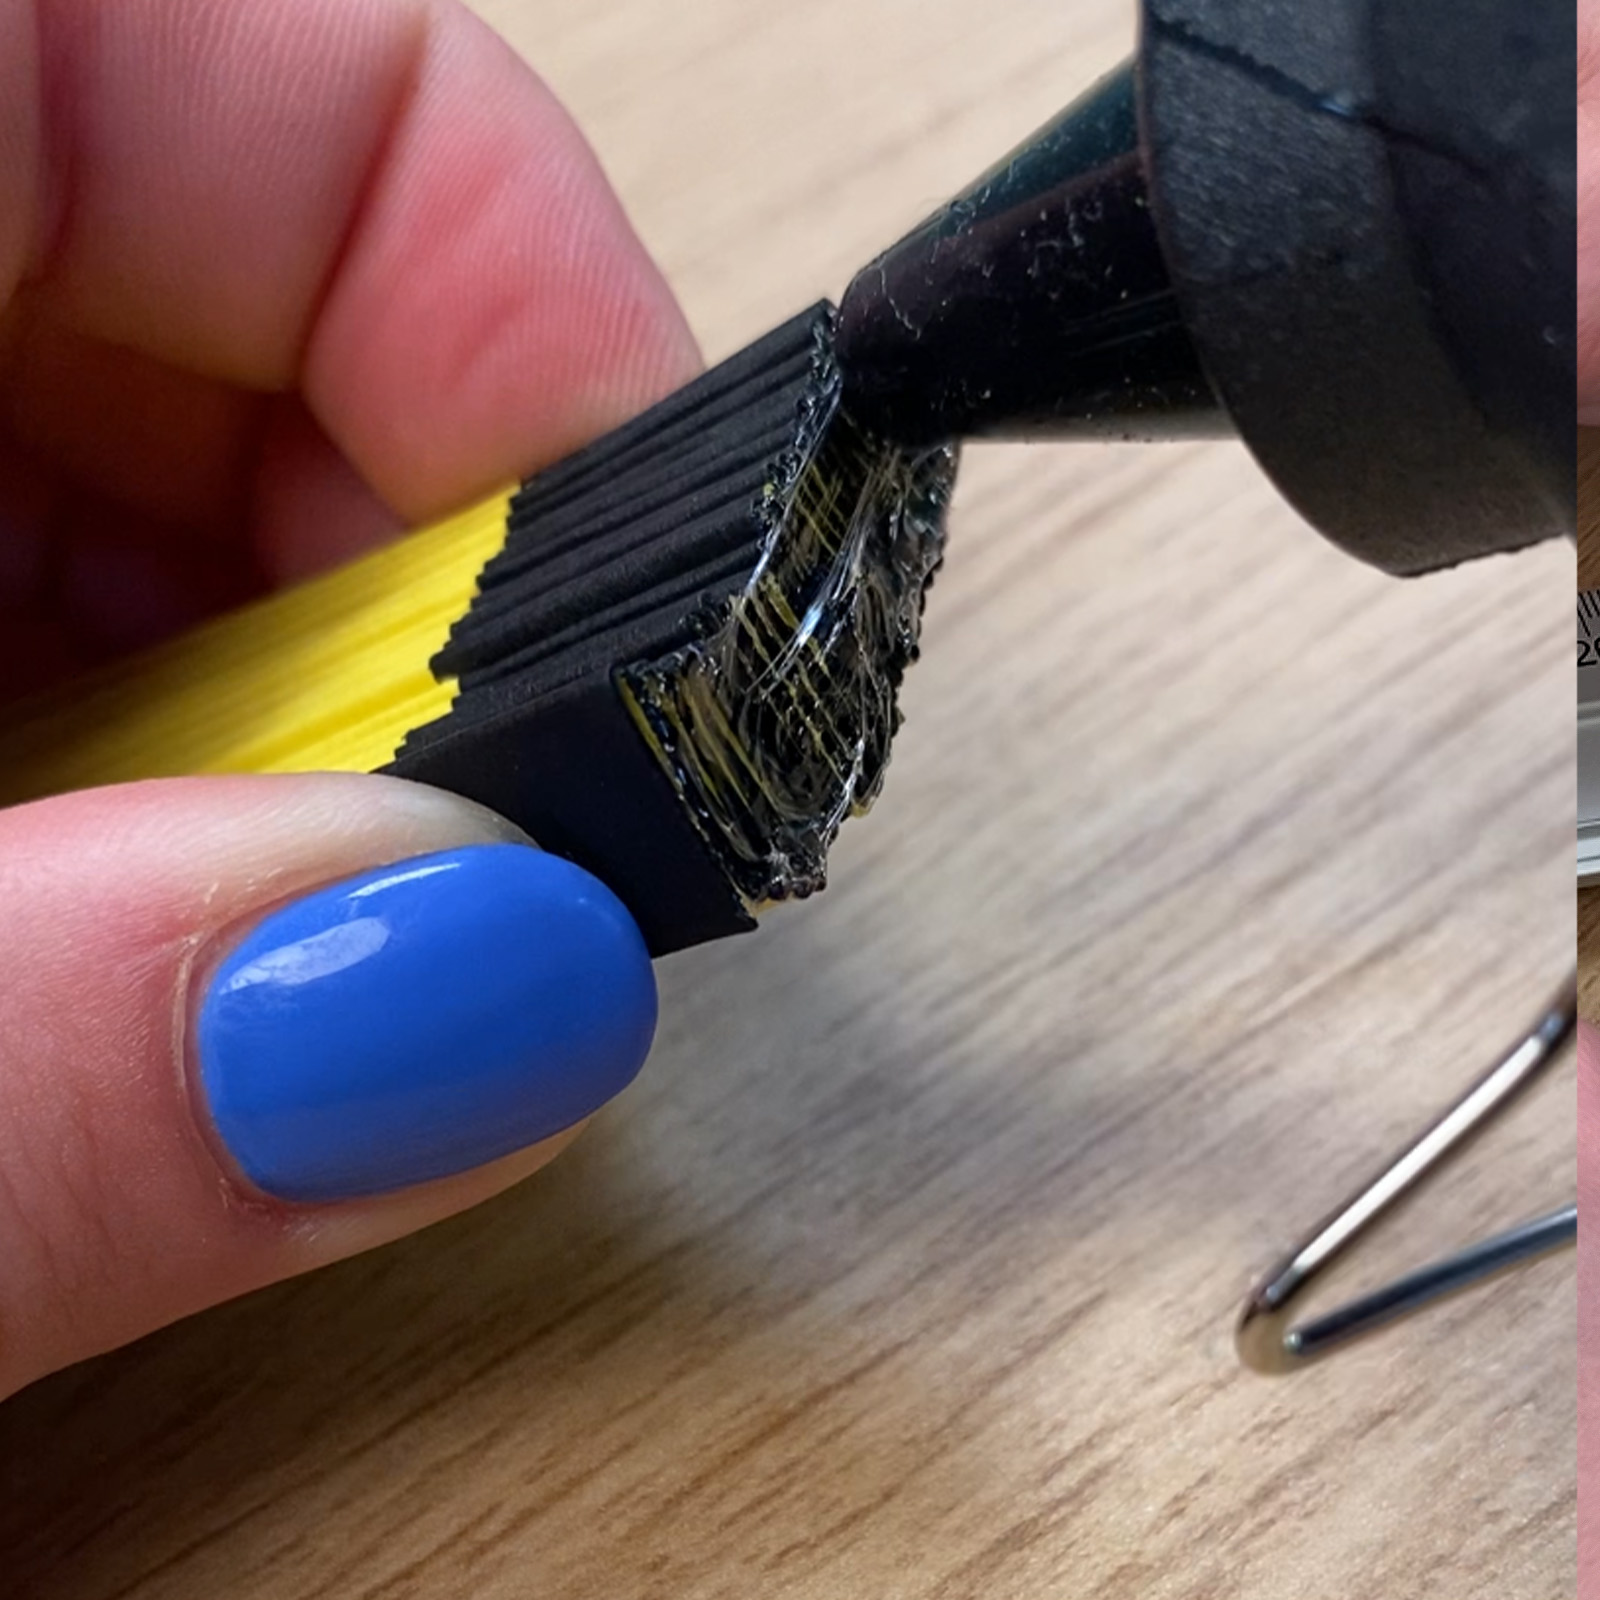
7
Fold the entire strip into an accordion shape. Use a glue gun to secure the (black) ends firmly together. Once released, the strip will open into a circle.
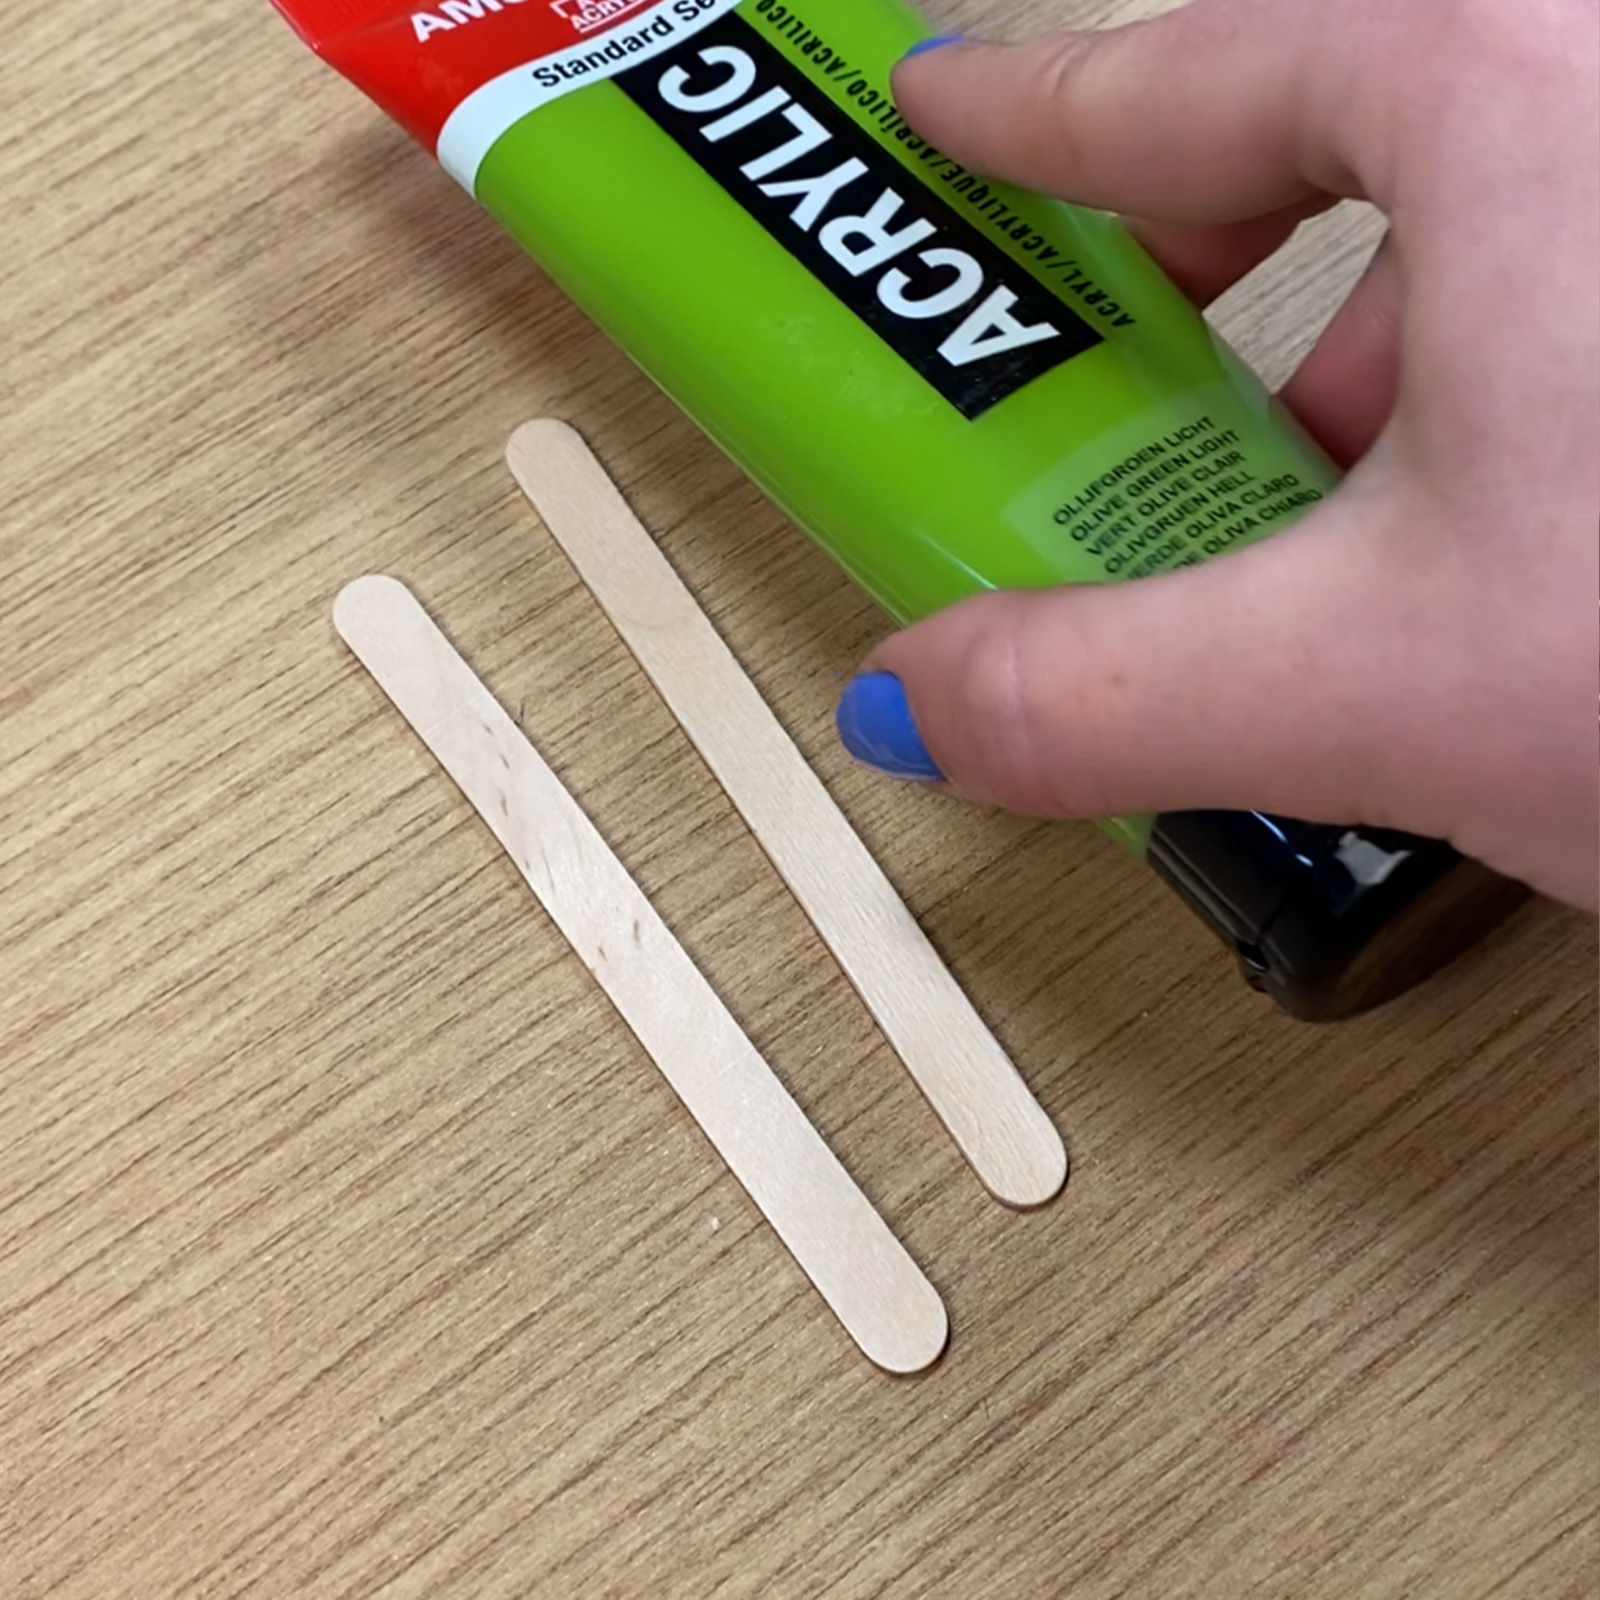
8
Paint two popsicle sticks green.
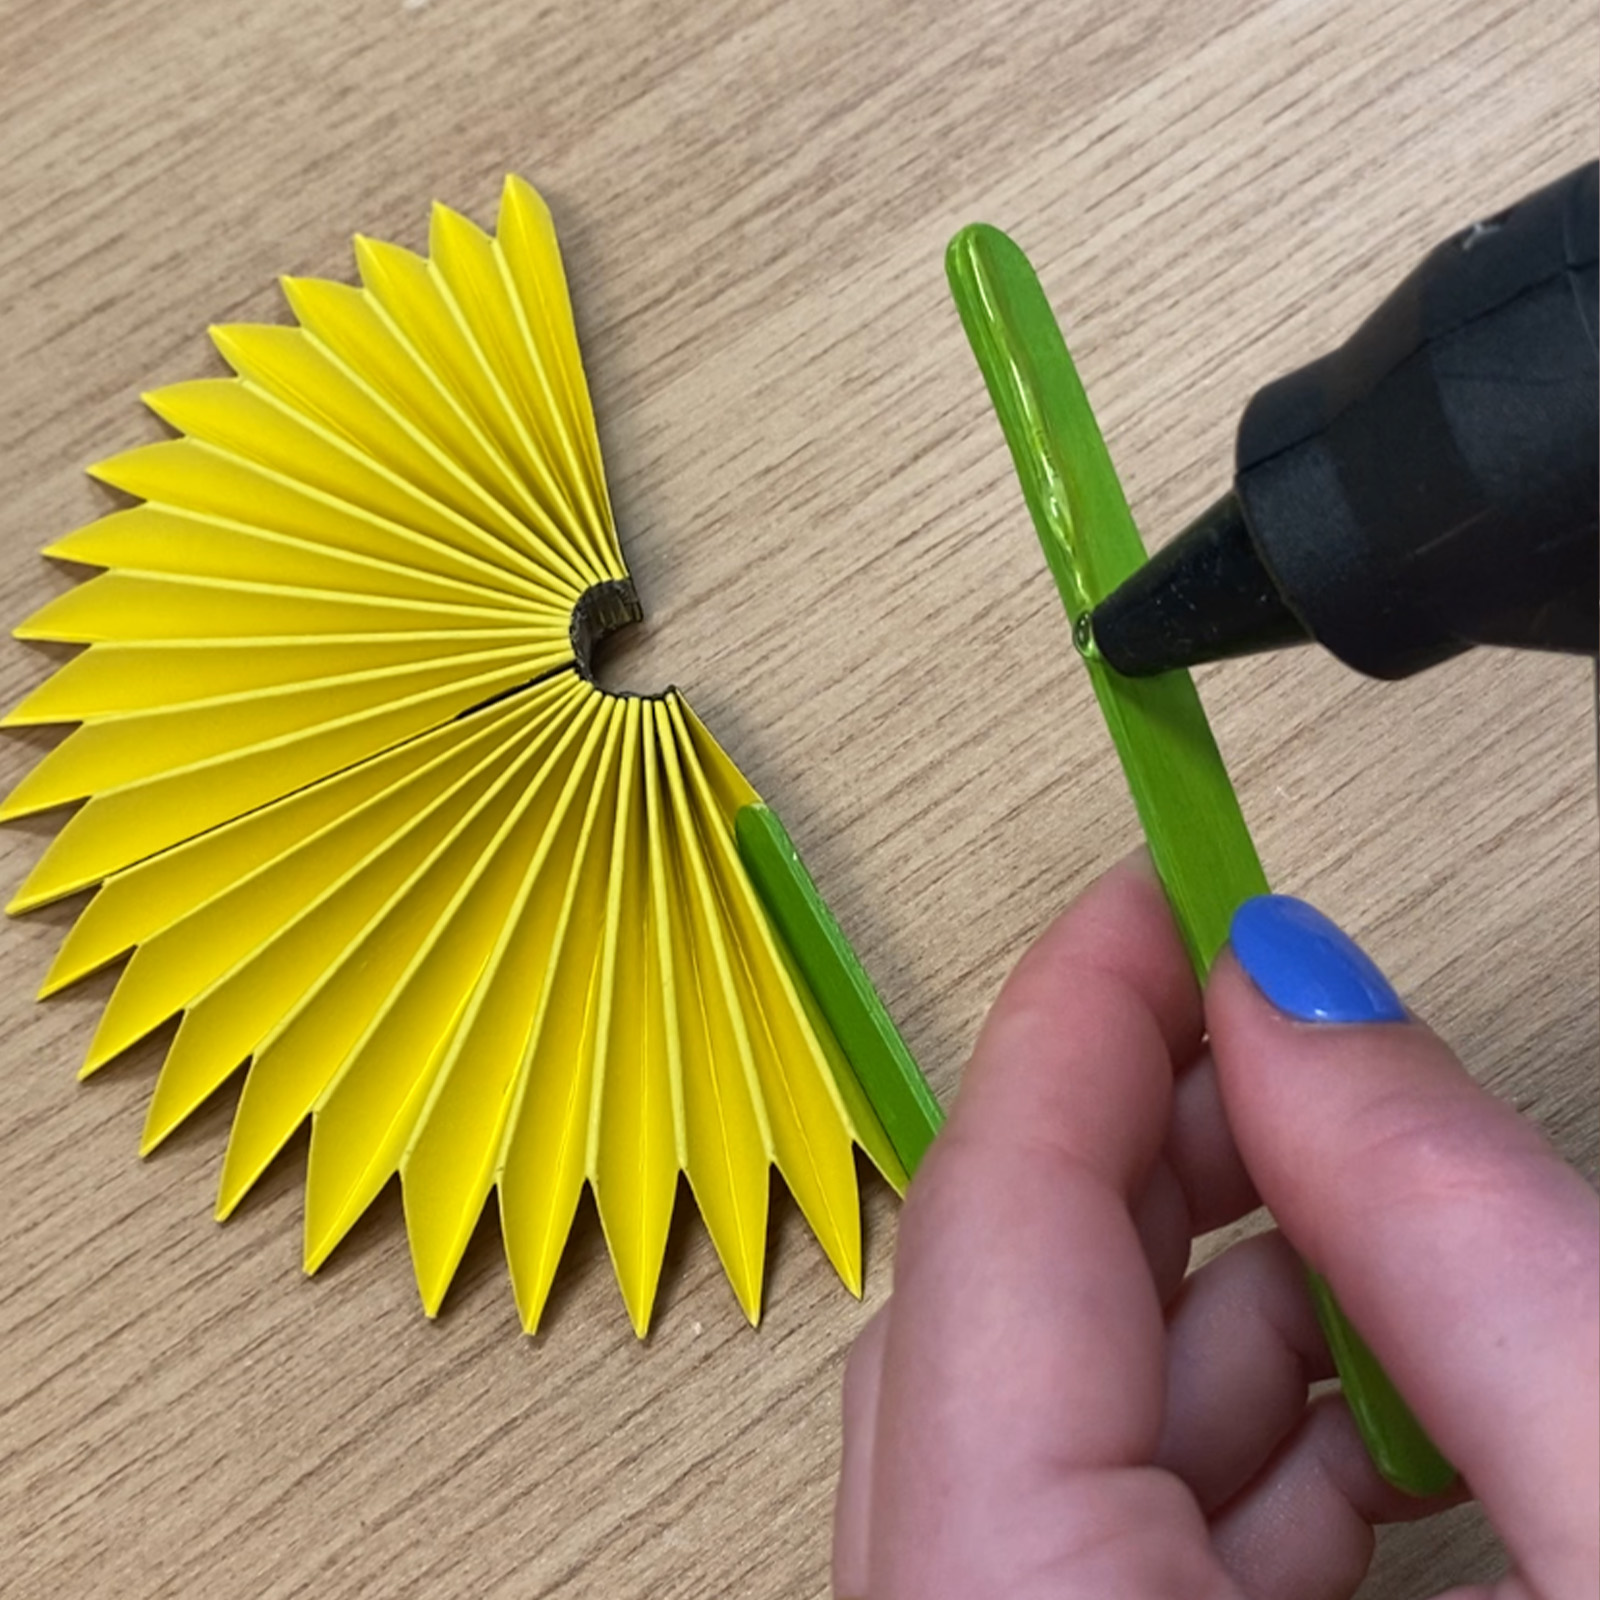
9
Glue the sticks to the back of the fan, placing them along a fold. Make sure they’re not visible from the front.
10
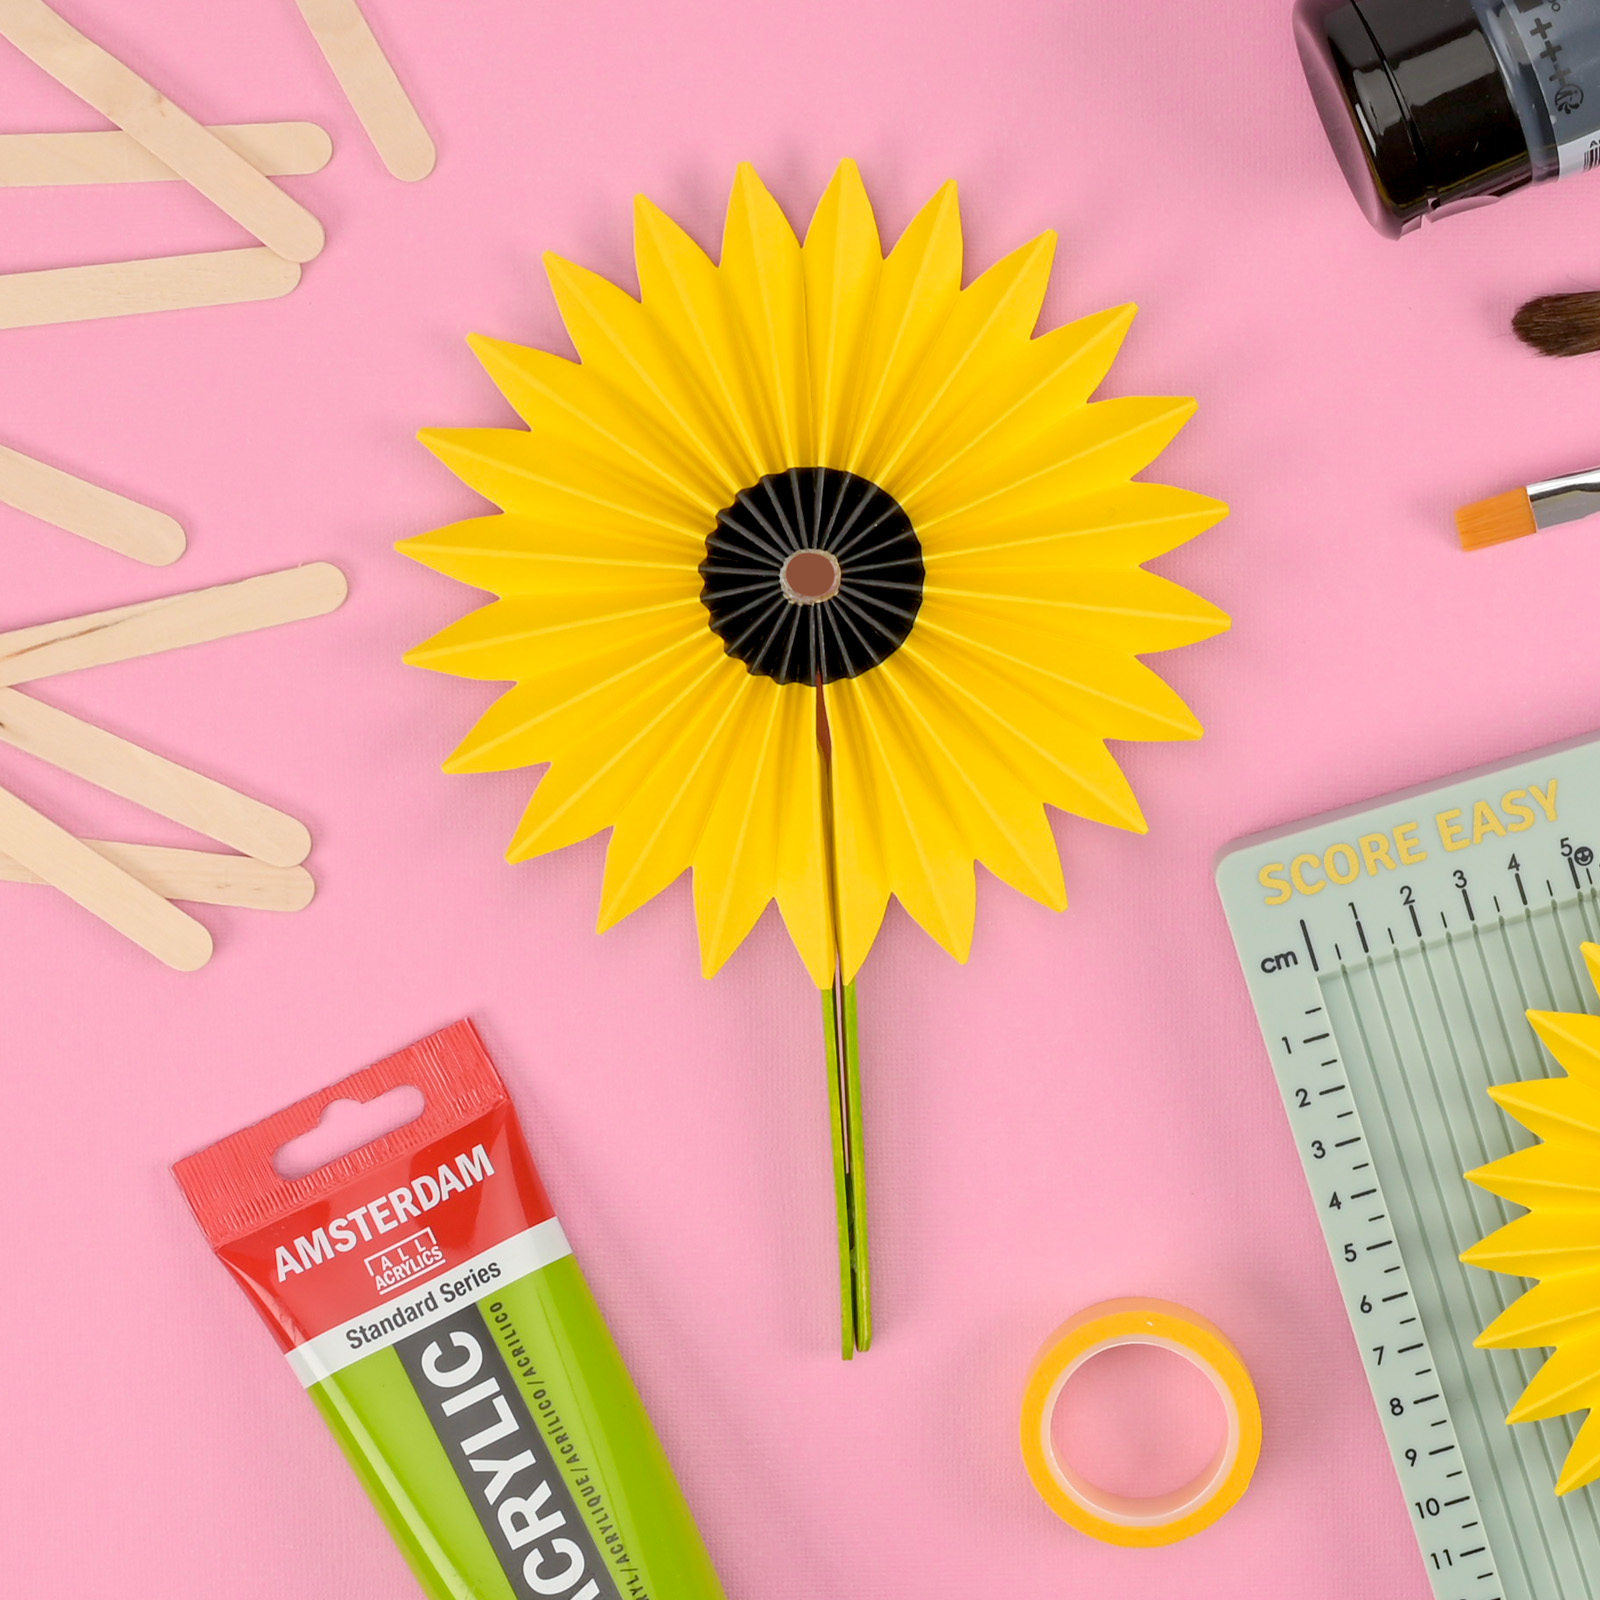
Fully open the fan into a flower shape. A lovely and practical way to keep cool on warm days!