Love making handmade cards? Discover how cardmaking becomes even more creative with layered stencils and colourful inks. Build your design layer by layer and create a unique card for any occasion.
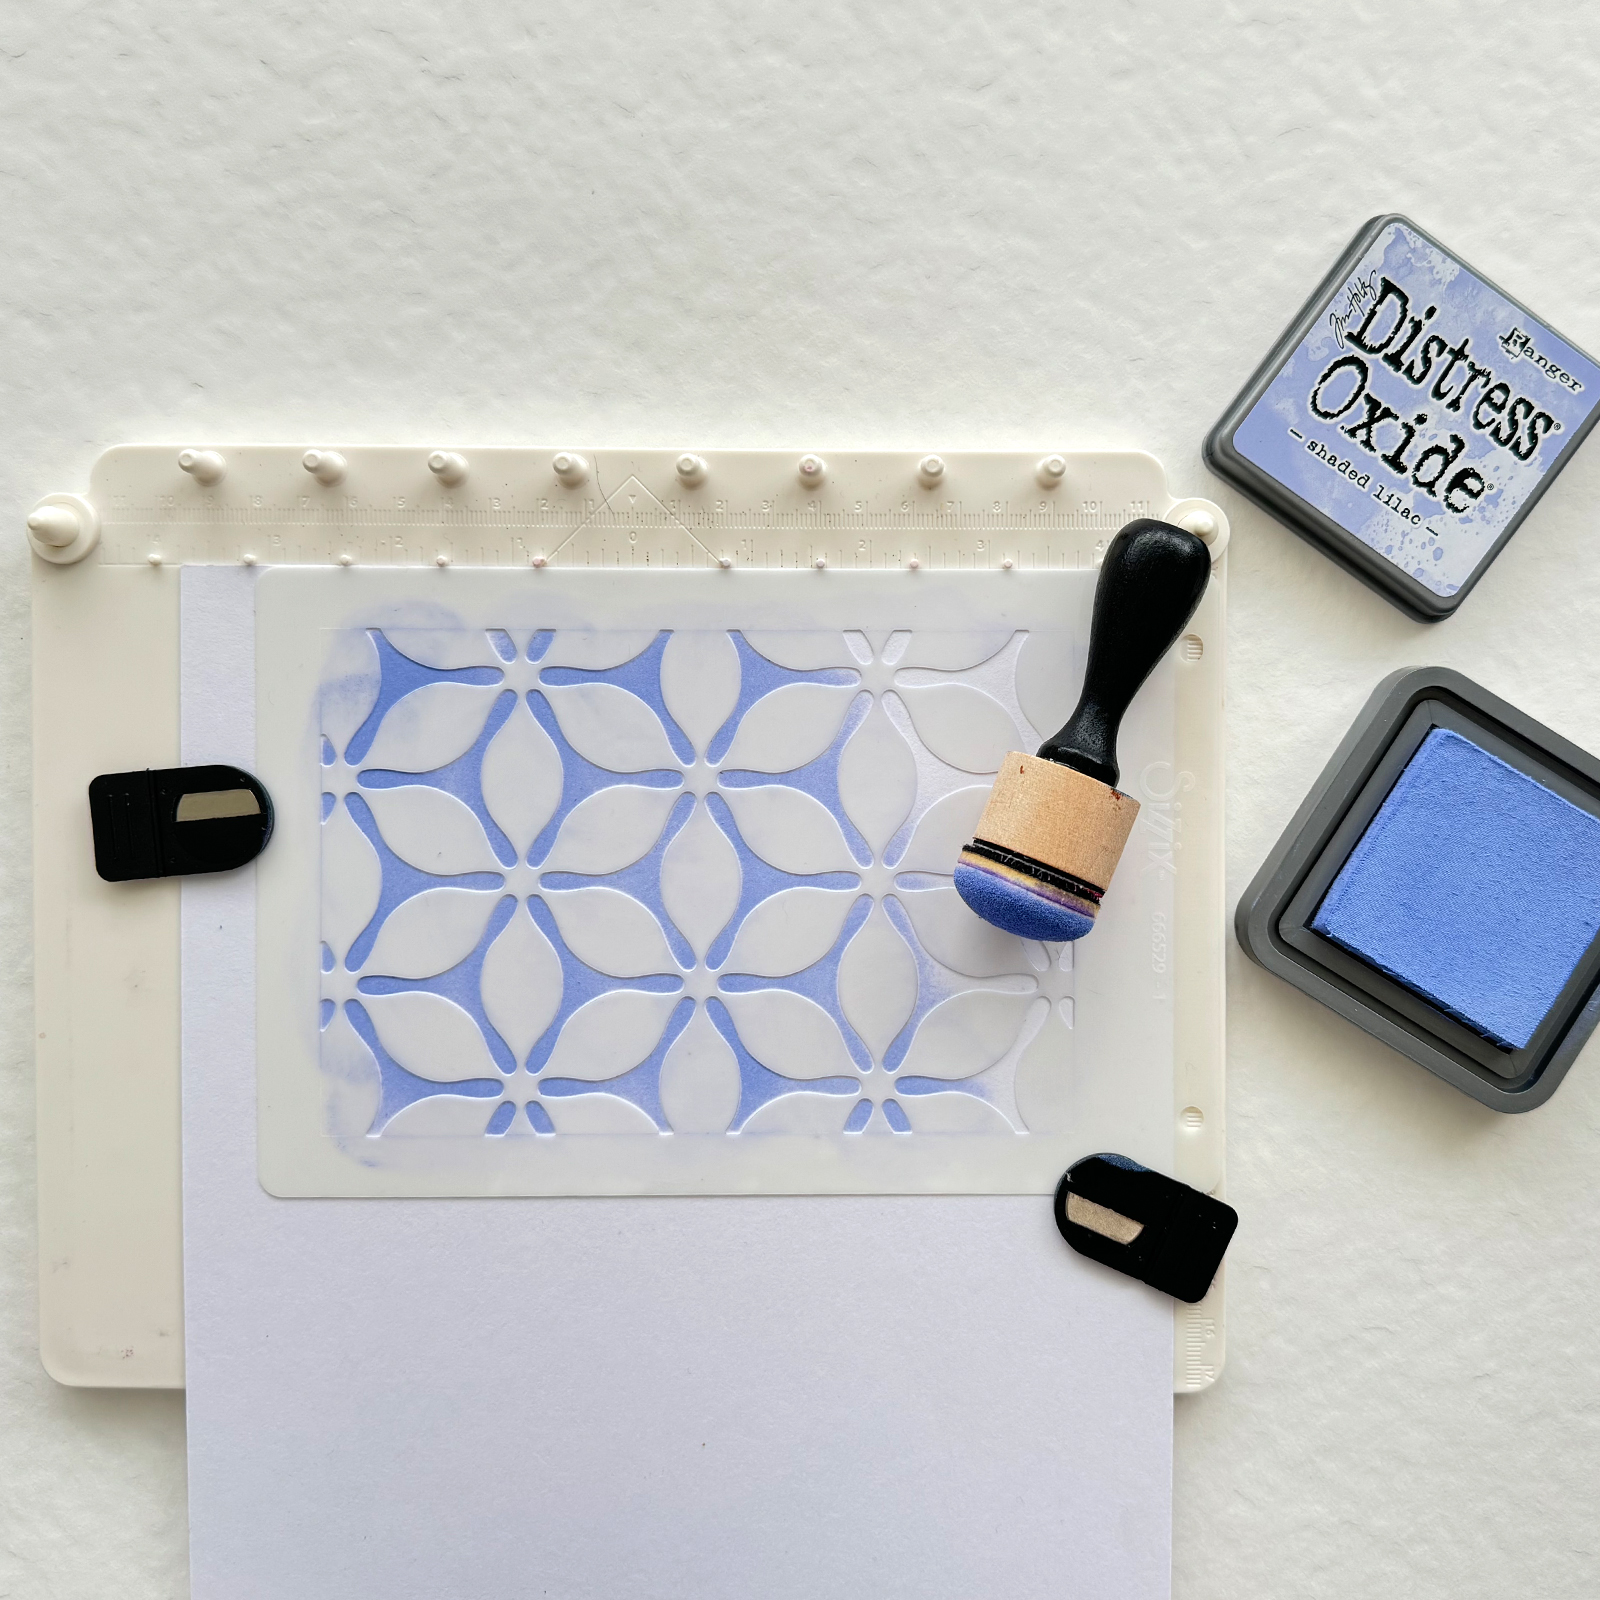
Place a sheet of A4-sized white watercolour paper on a work mat or stamping platform. Position the first stencil on top and apply ink using a blending tool.
2
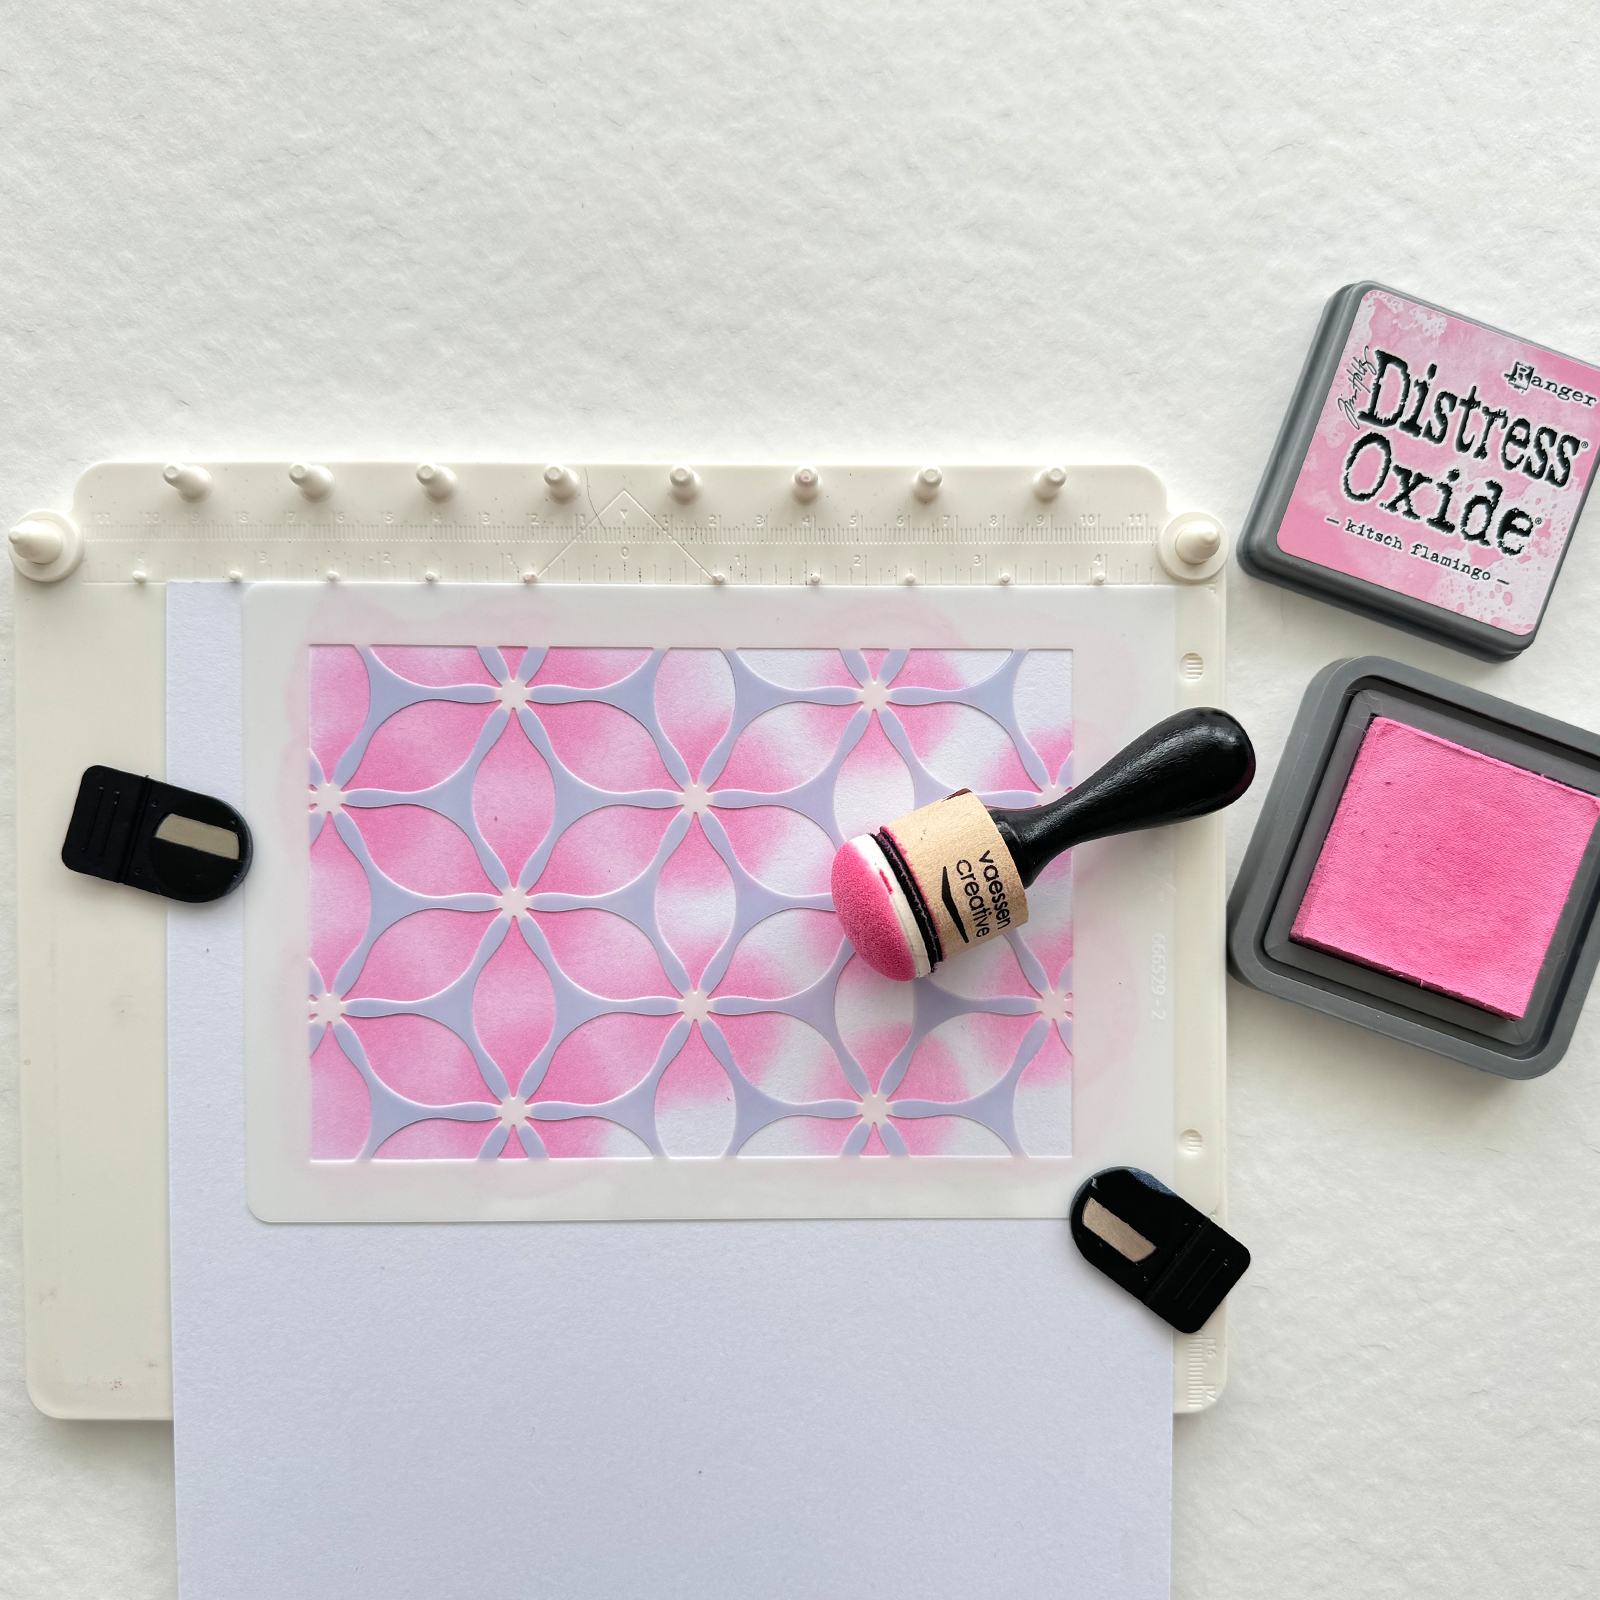
Take the second stencil and place it directly over the ink applied earlier. Opt for a different ink colour for the second layer. Start blending from the middle of the flowers using the blending tool to create a gradient effect.
3
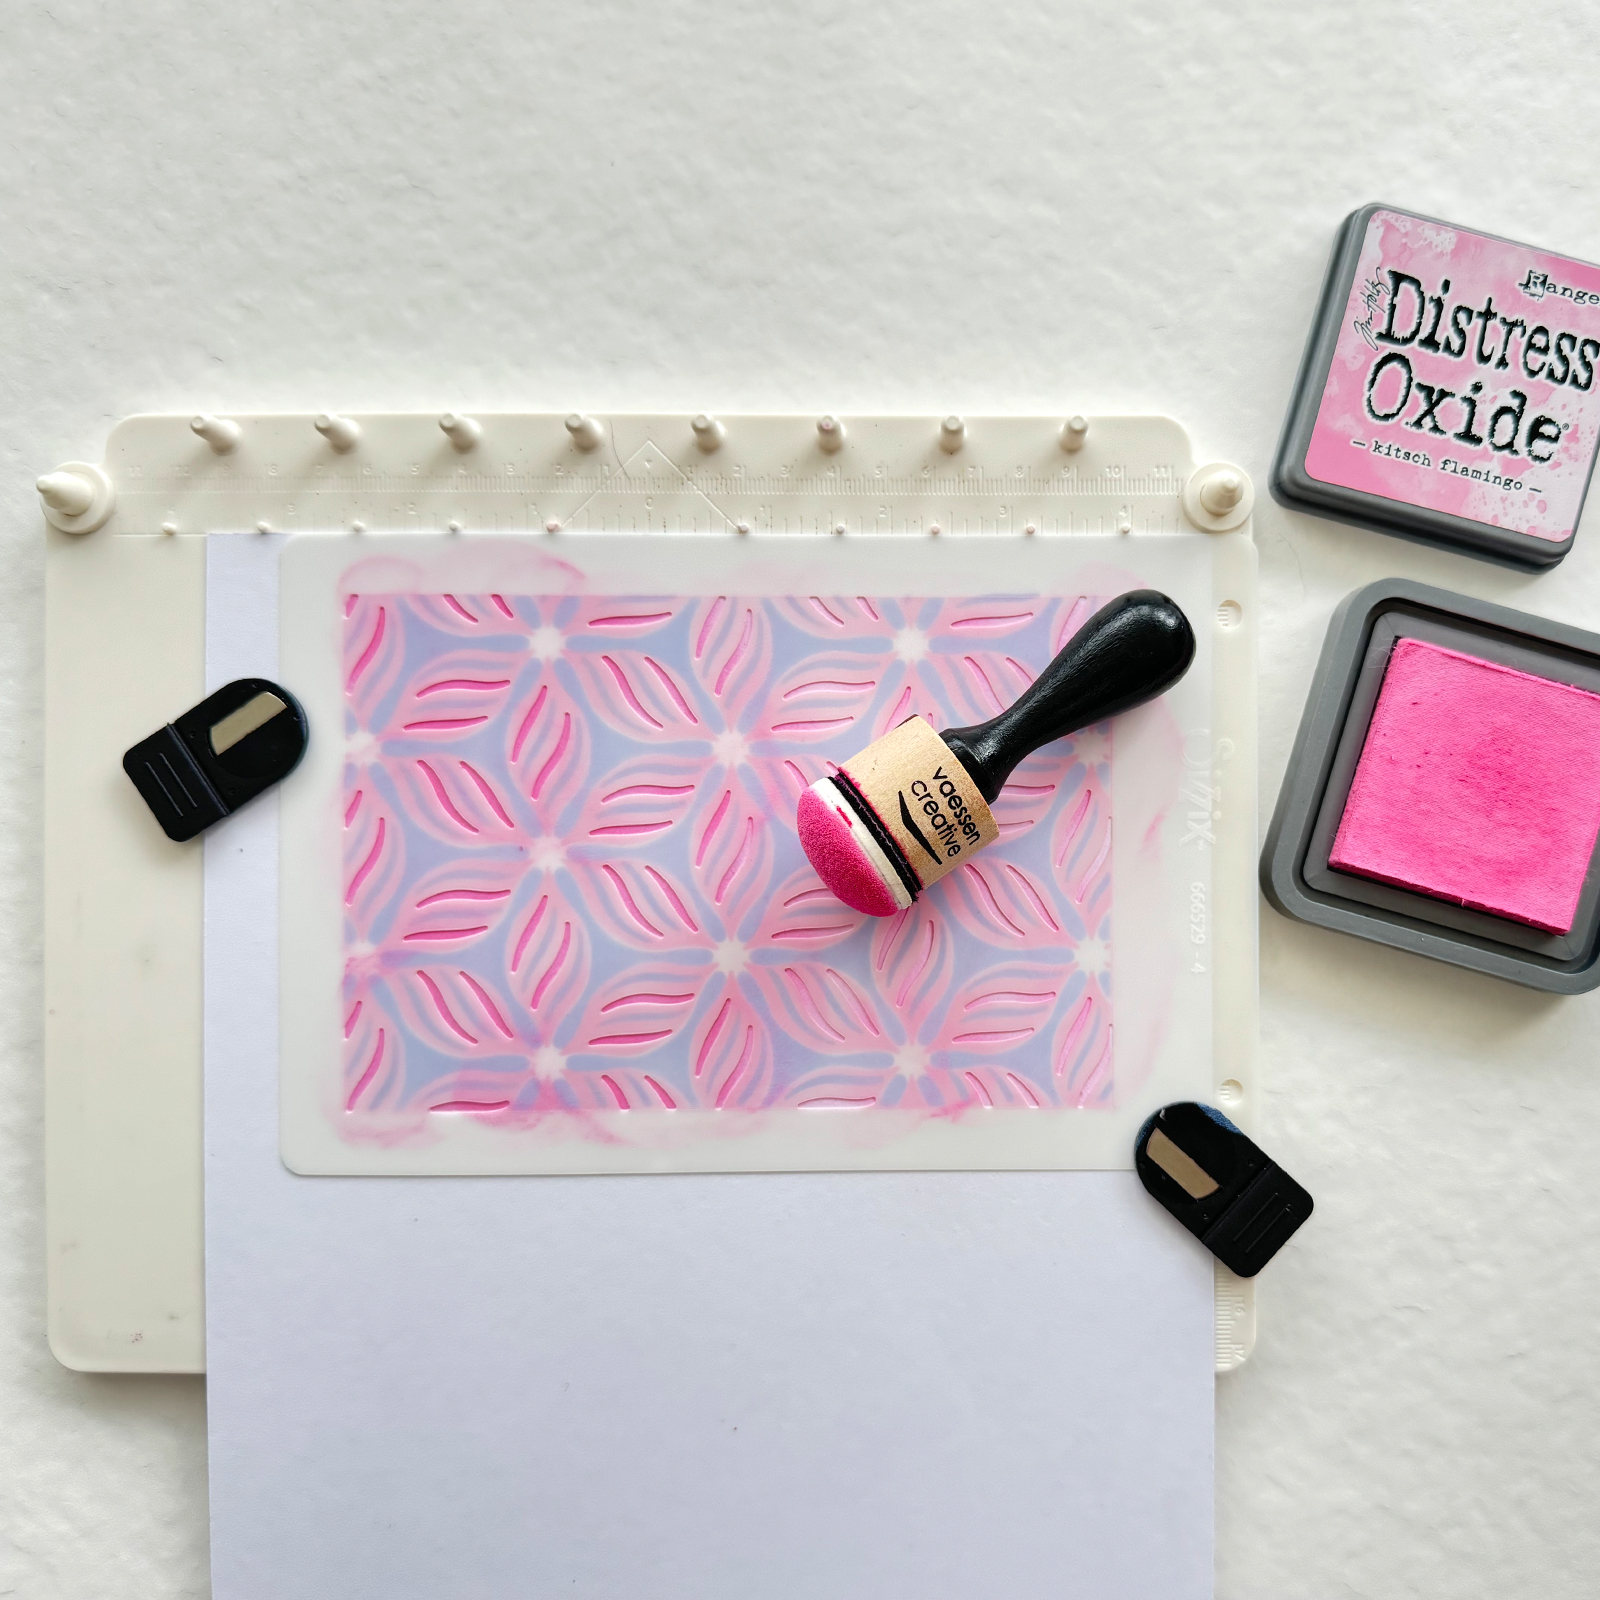
Next, lay stencil number three on the work surface and apply the first ink colour again. Repeat this process with stencil number four, using the colour from step 2.
4
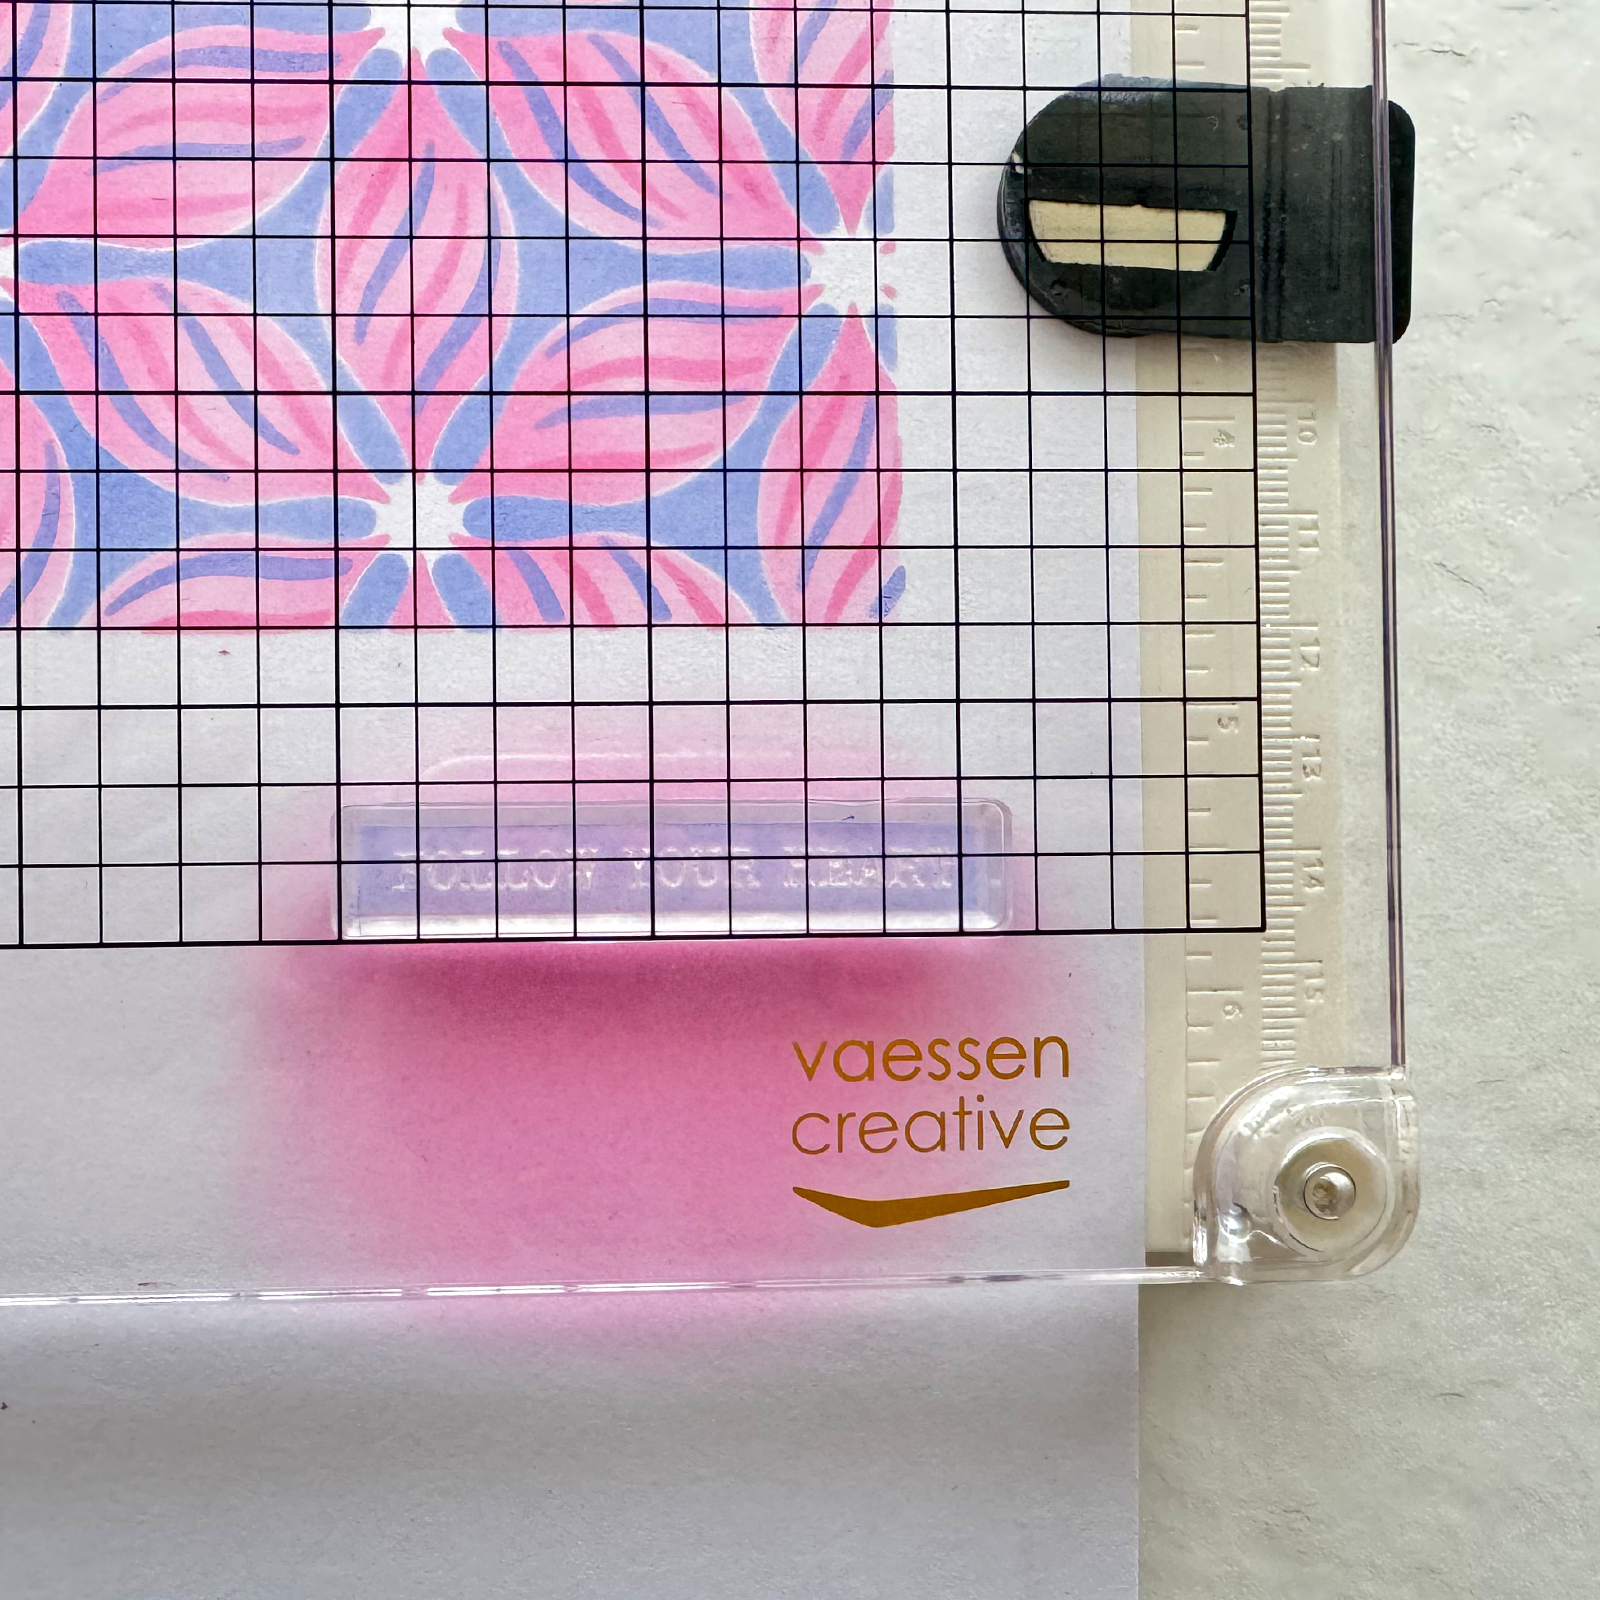
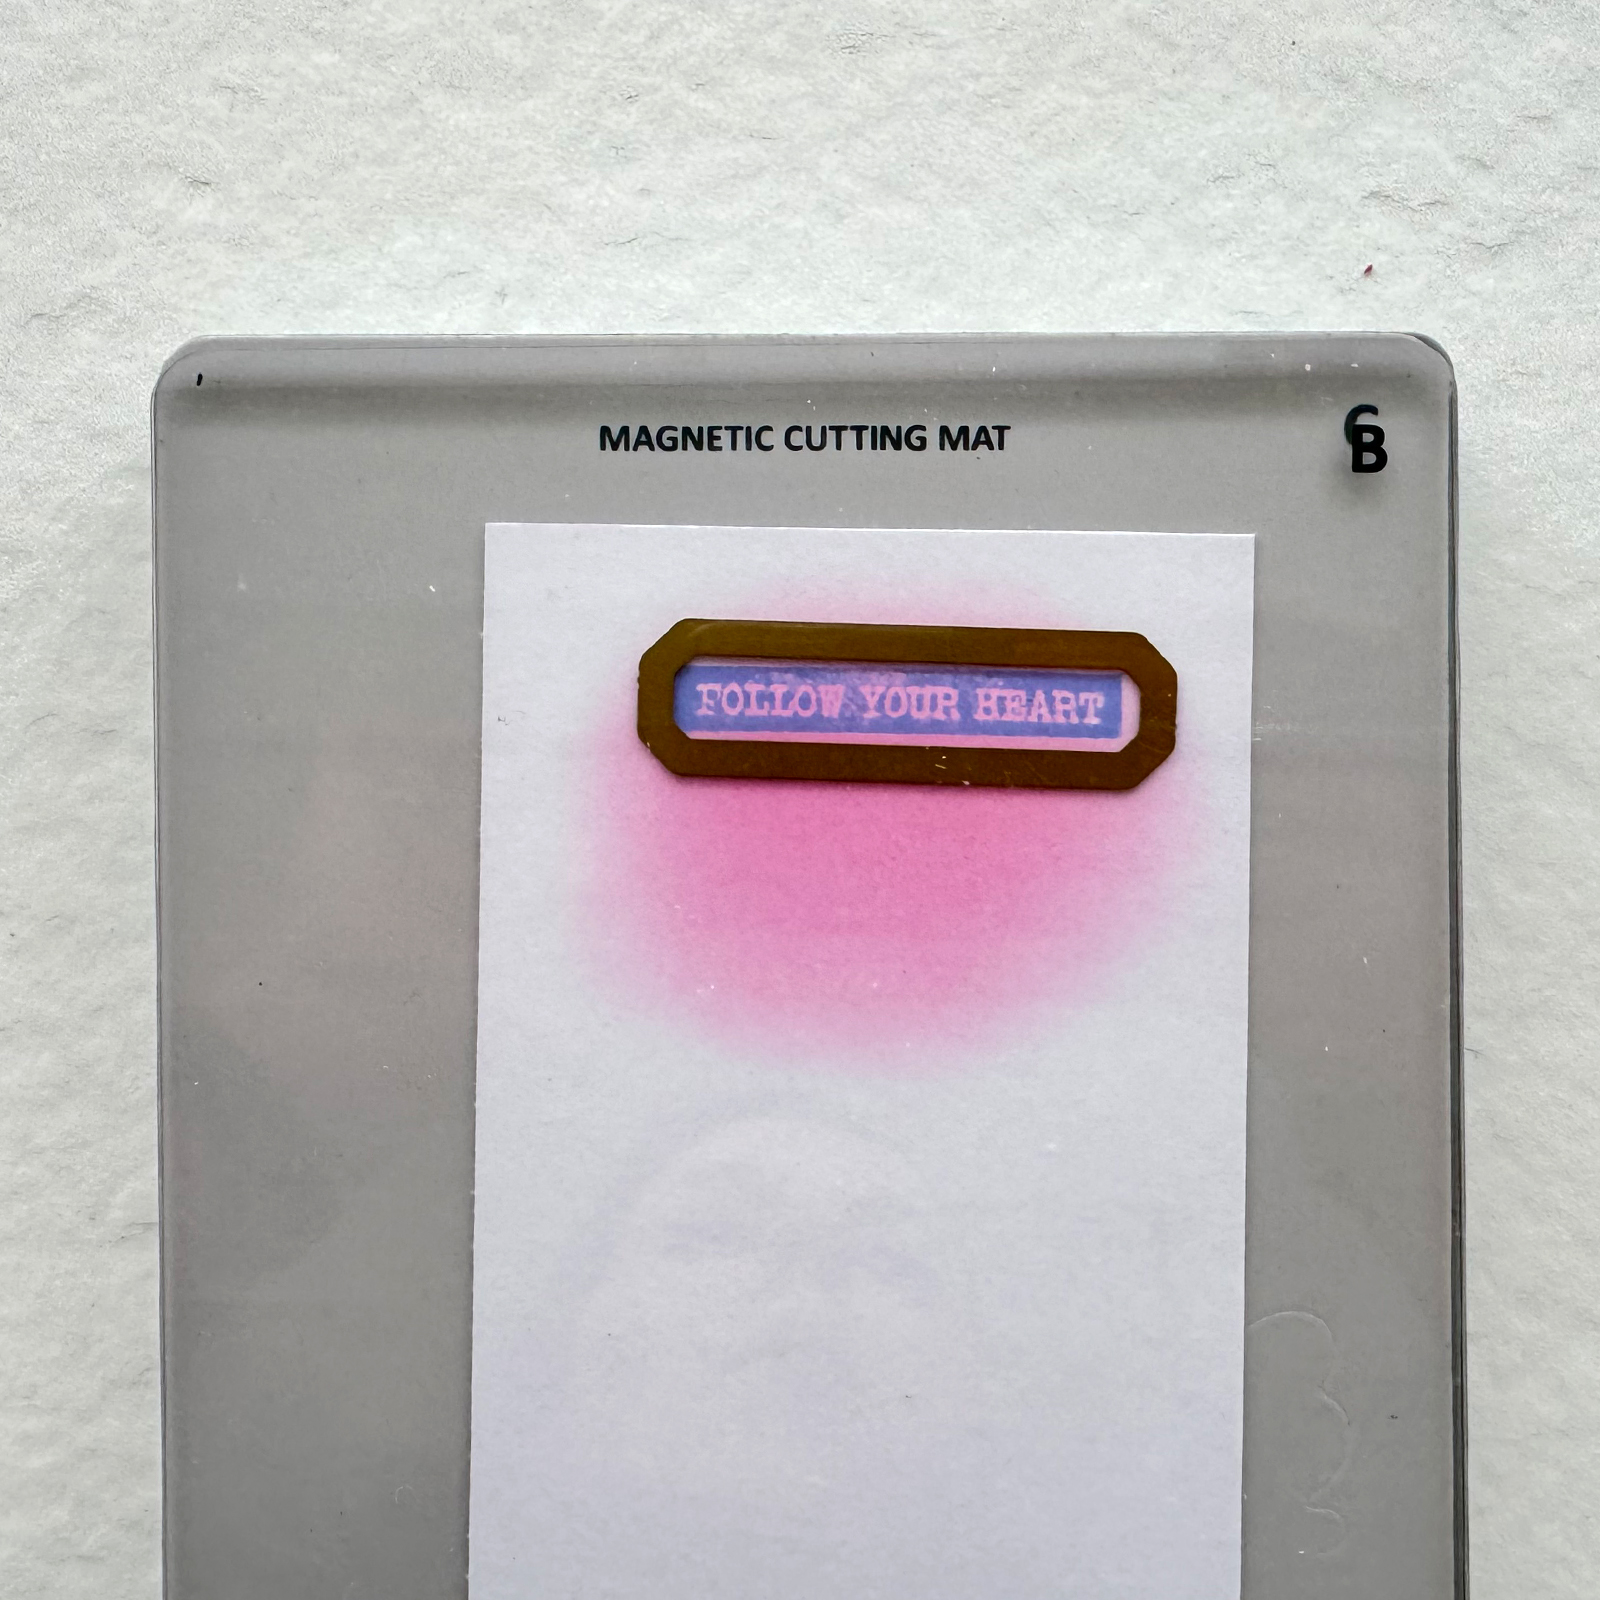
Use one ink colour to create a blended spot on the sheet where stencilling was done. Stamp a text on it using the other colour.
5
Cut out or trim this text, optionally using an embossing machine.
6
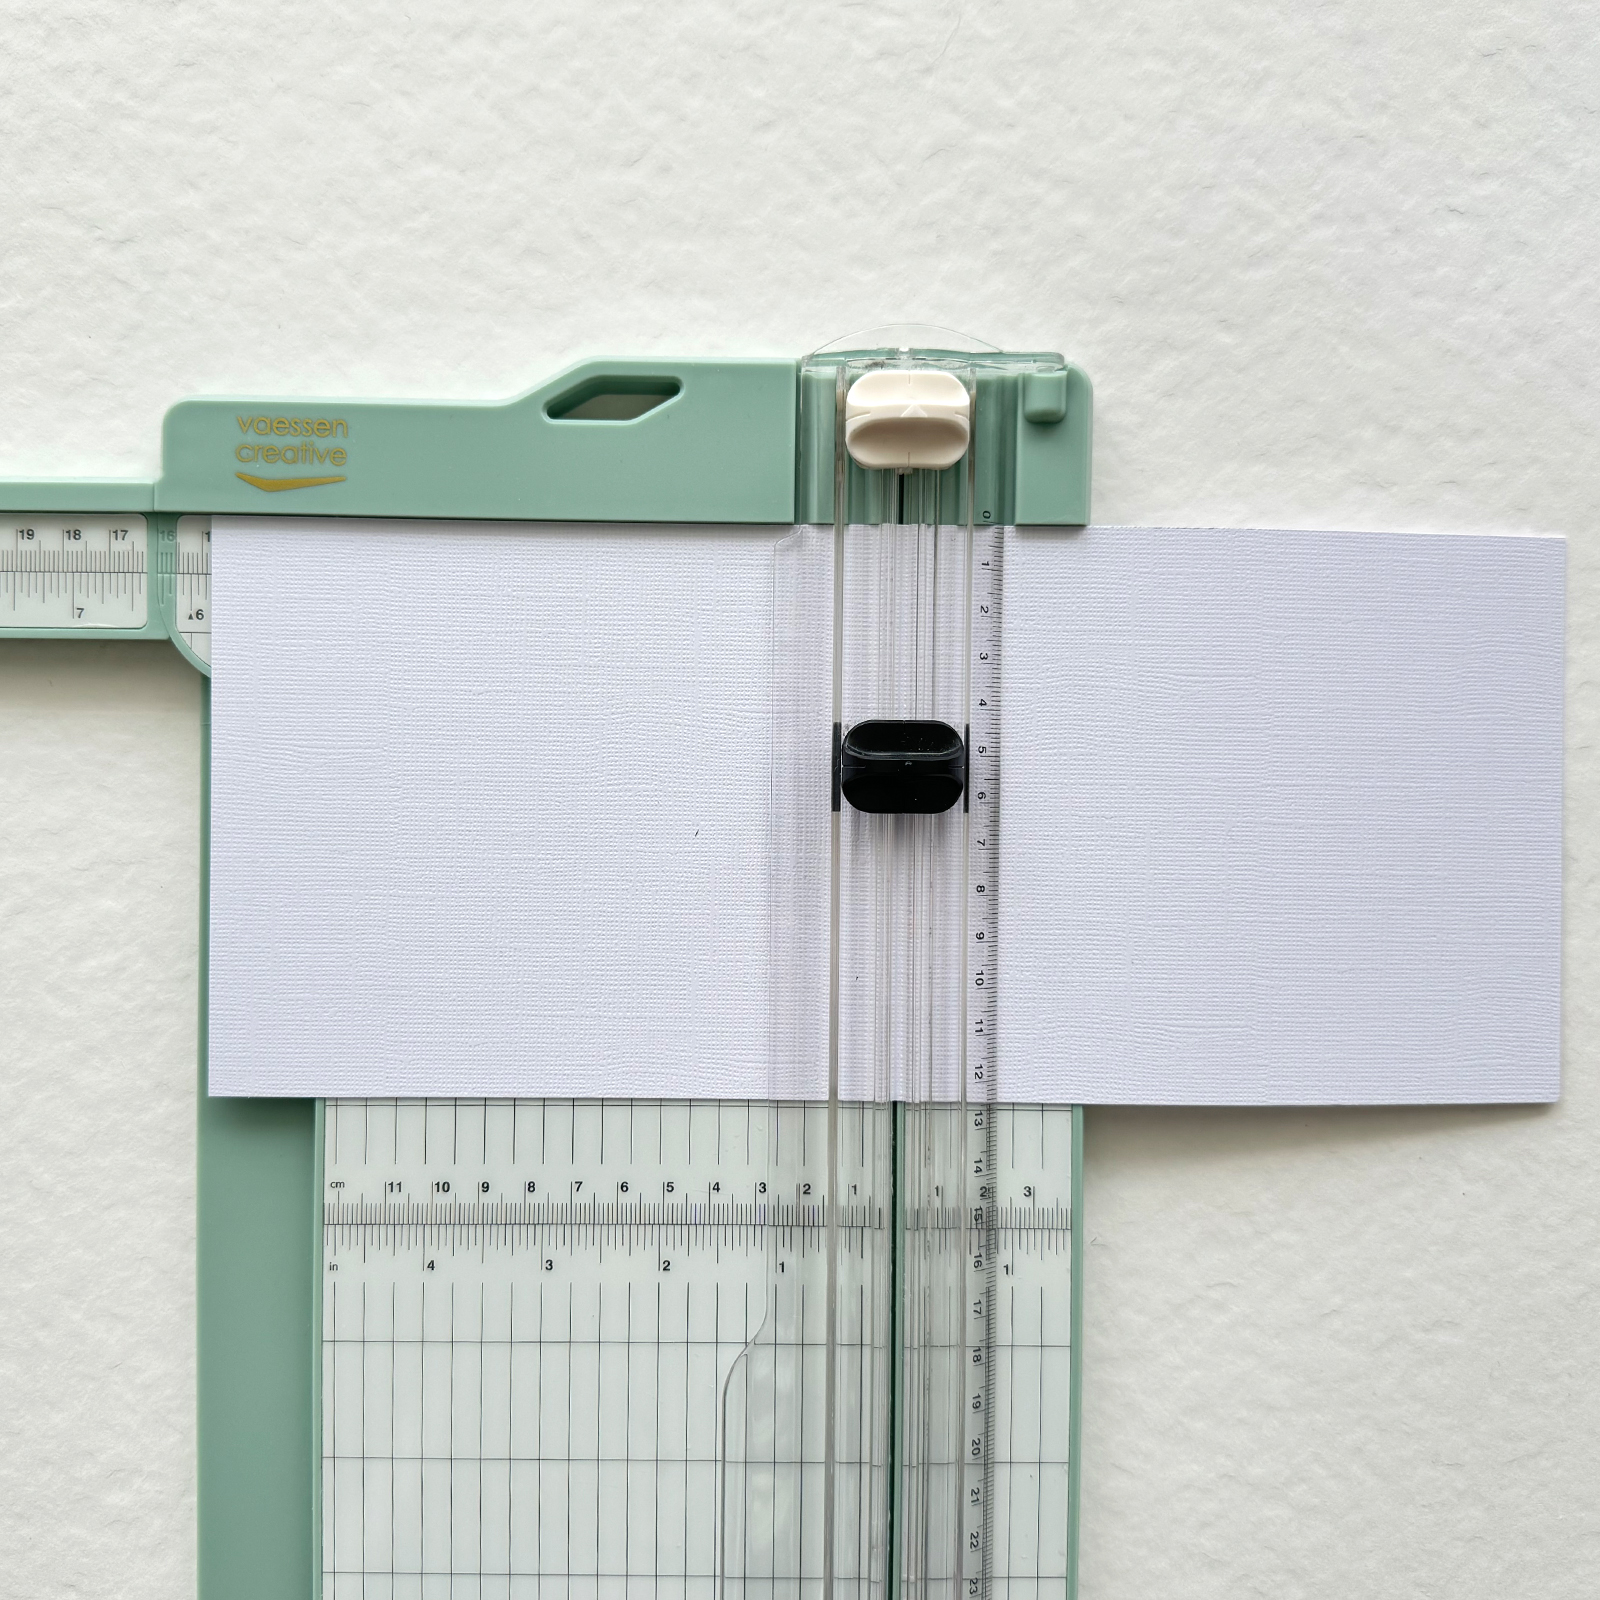
Cut a sheet of white cardstock to 4.9 x 11.6 inches (12.5 x 29.7 cm) and score it in the middle at 5.8 inches (14.8 cm).
7
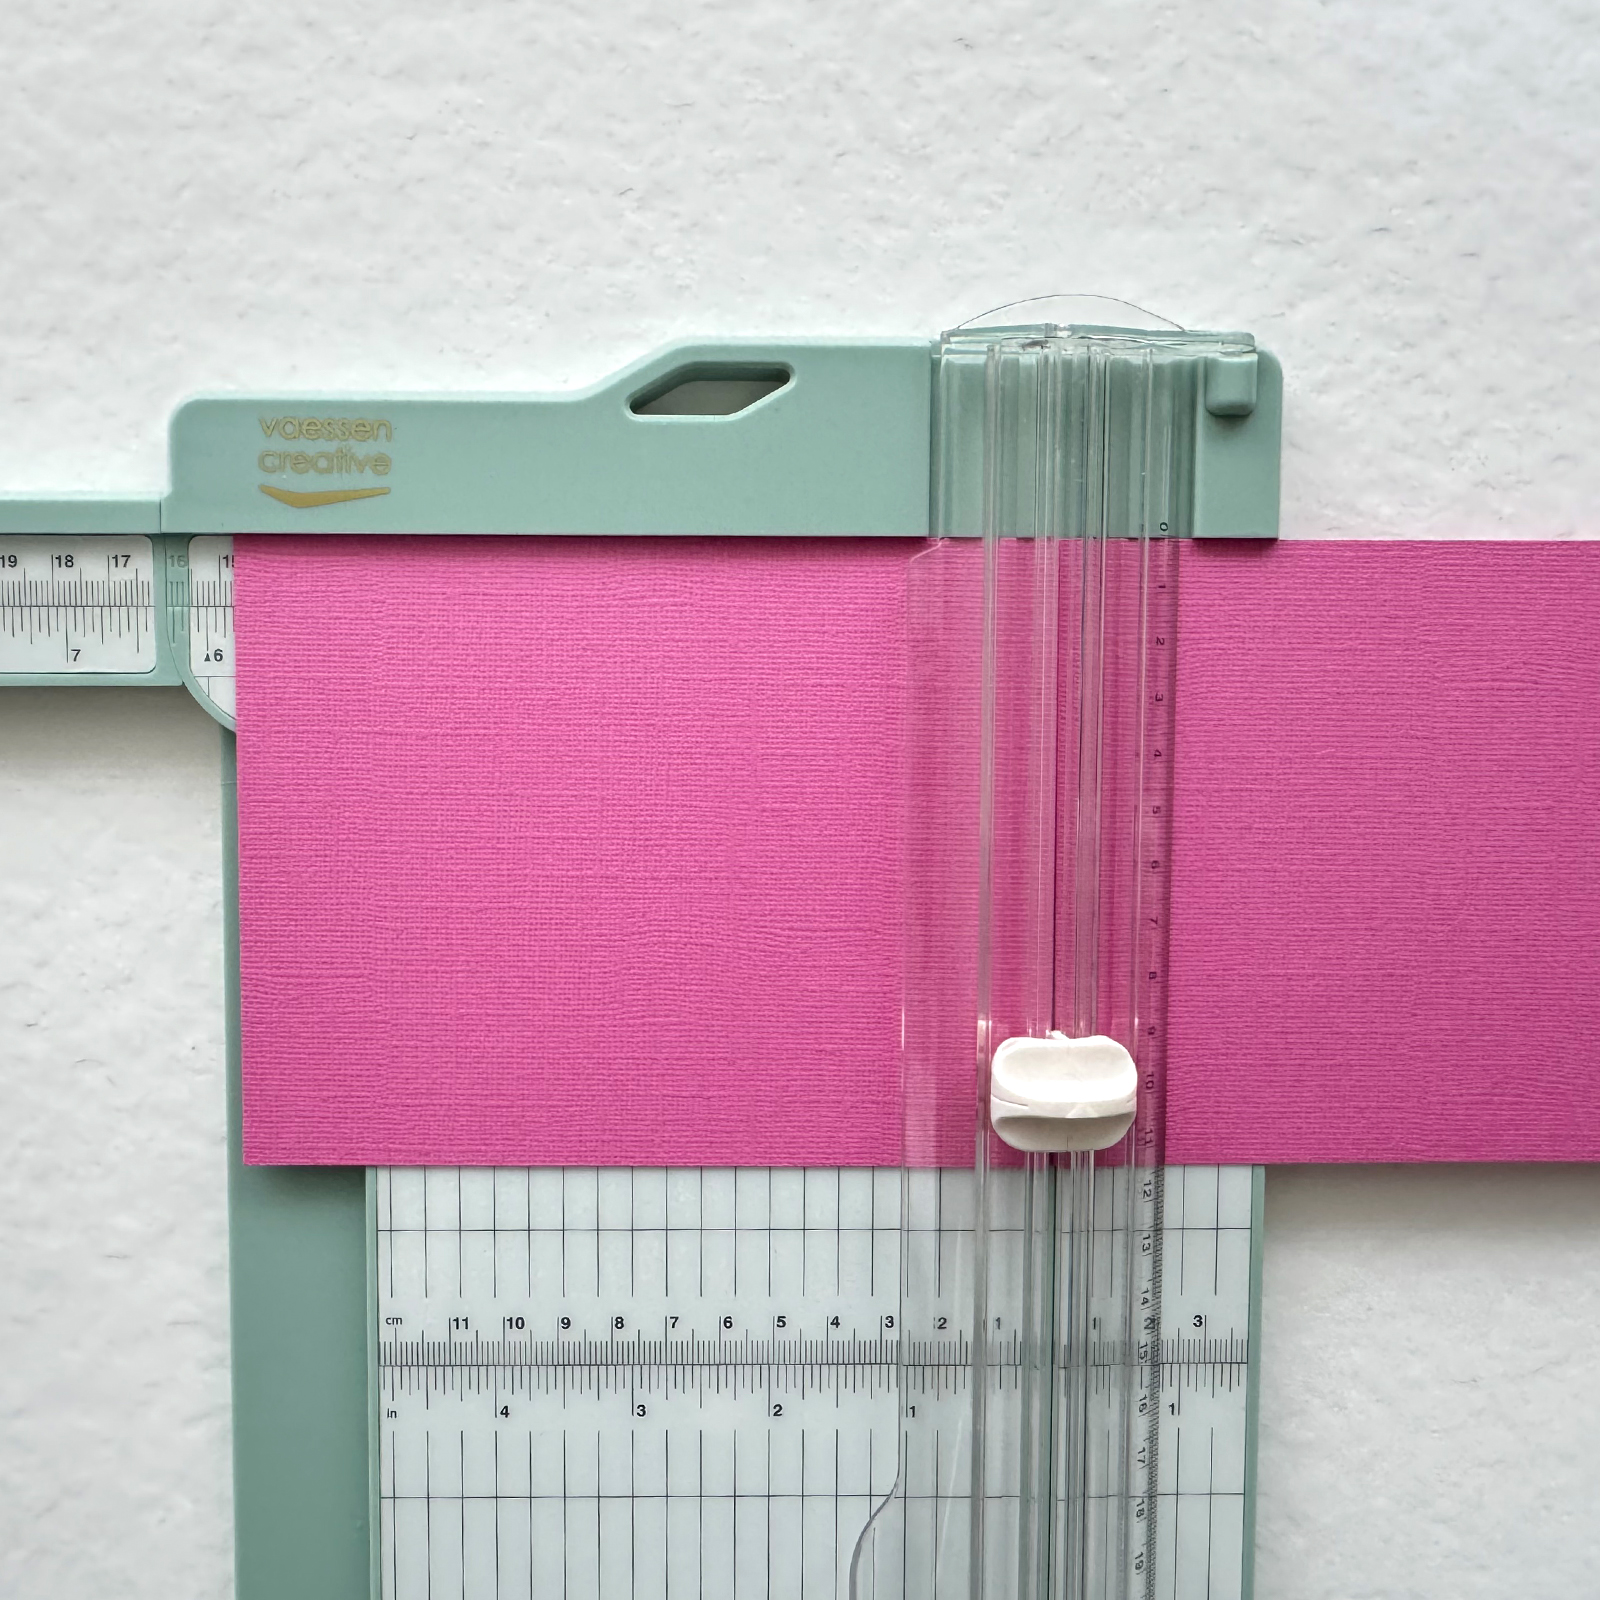
Cut a sheet of pink cardstock to 4.5 x 5.8 inches (11.5 x 14.8 cm) and trim the stencilled work to 4.1 x 5.8 inches (10.5 x 14.8 cm).
8
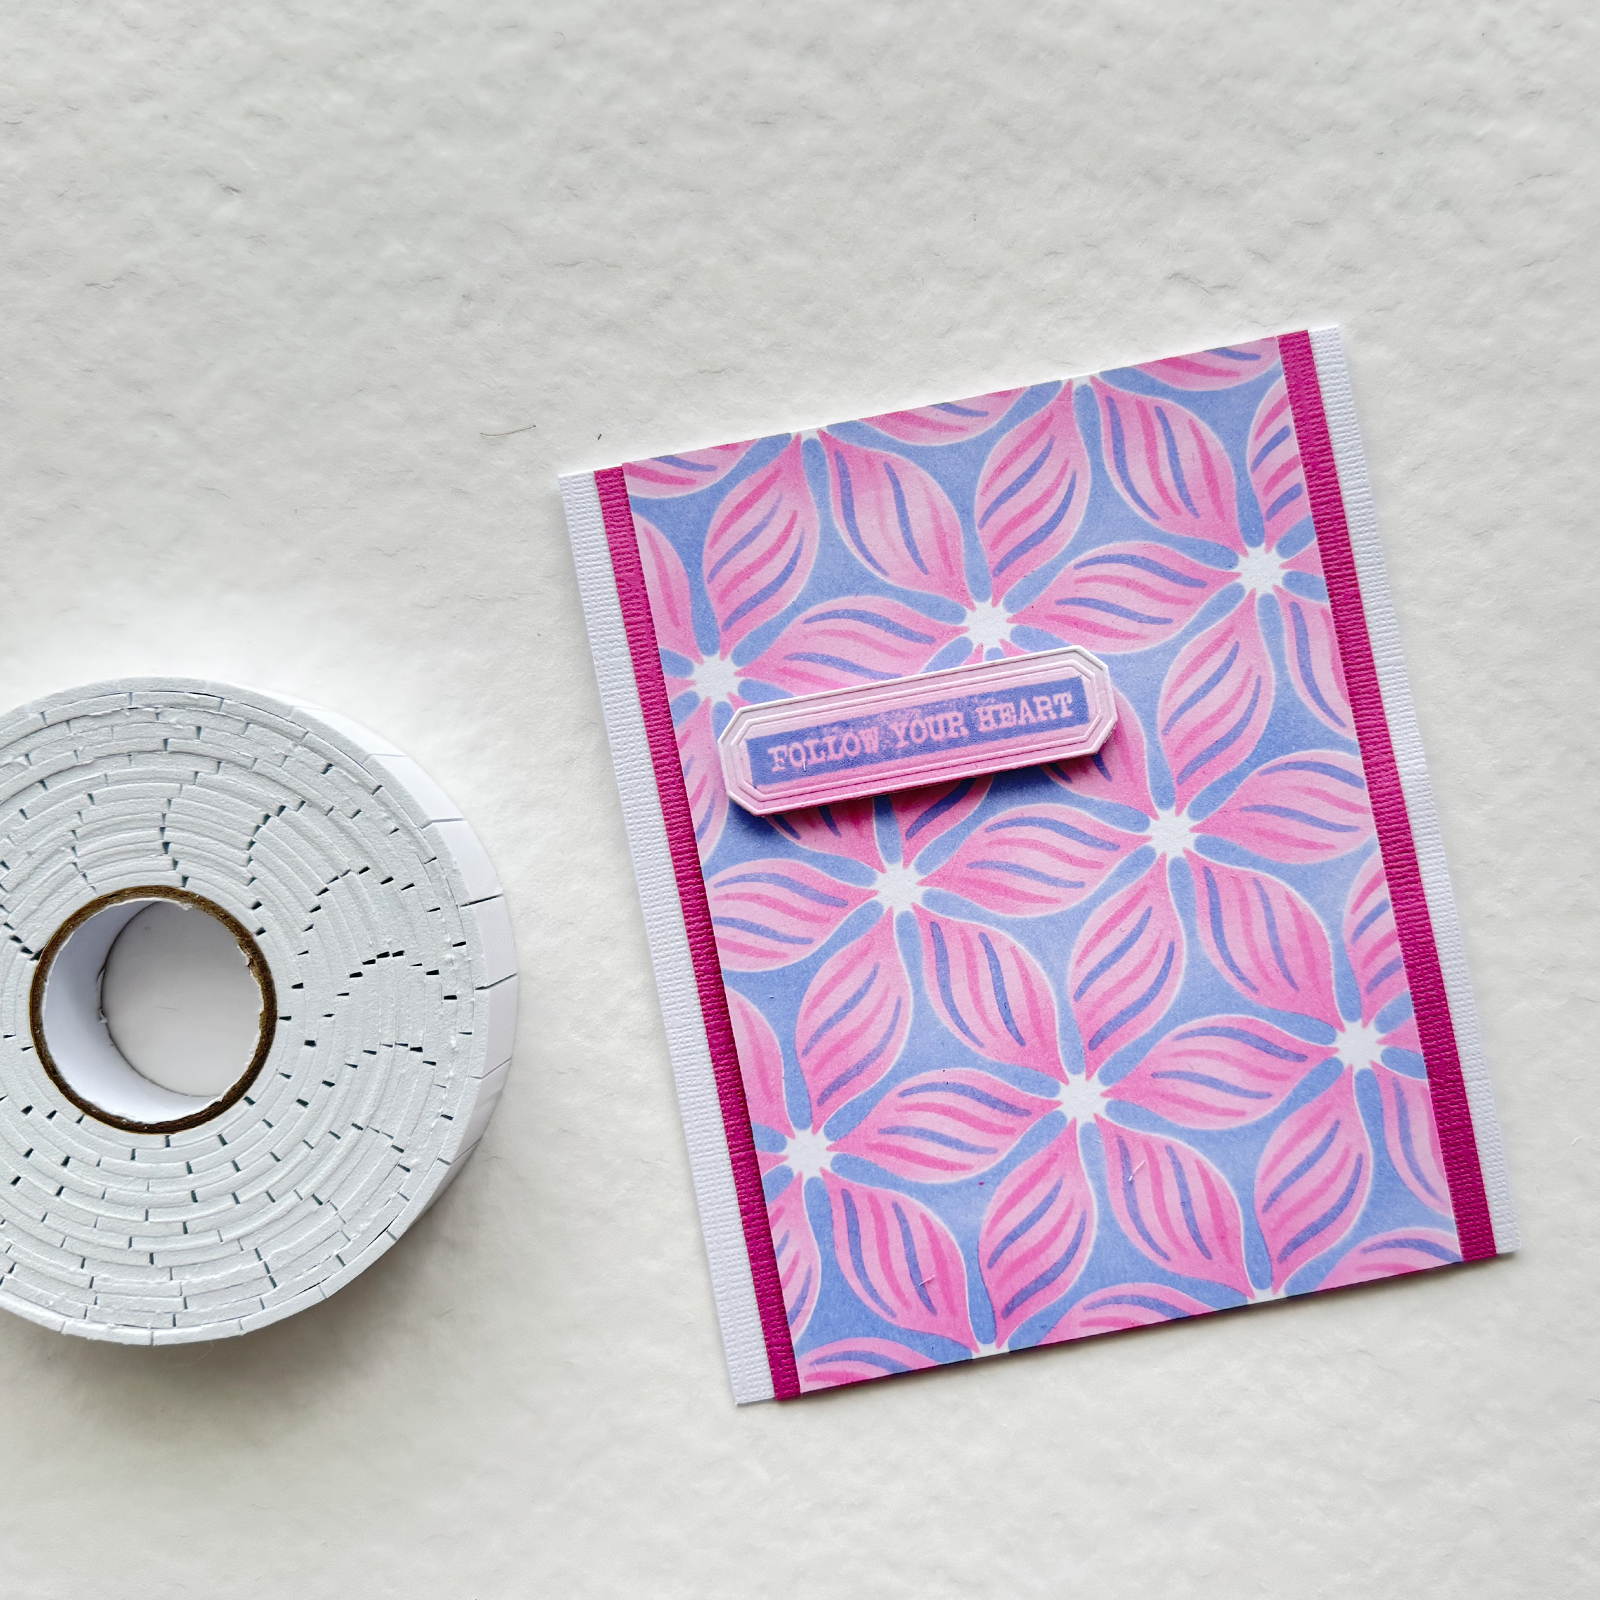
Finally, assemble all the components to create a beautiful card. Attach the text using 3D foam tape for added depth.