Are you a fan of scrapbooking and looking for fresh inspiration? In this DIY, we show how combining different types of paper creates a playful and creative scrapbook page. Get inspired and enjoy working on this fun paper project!
Start by taking a piece of translucent paper (vellum) and a stamp with a pattern. Apply the pattern to the paper using ink, ensuring the pattern covers the entire sheet.
2
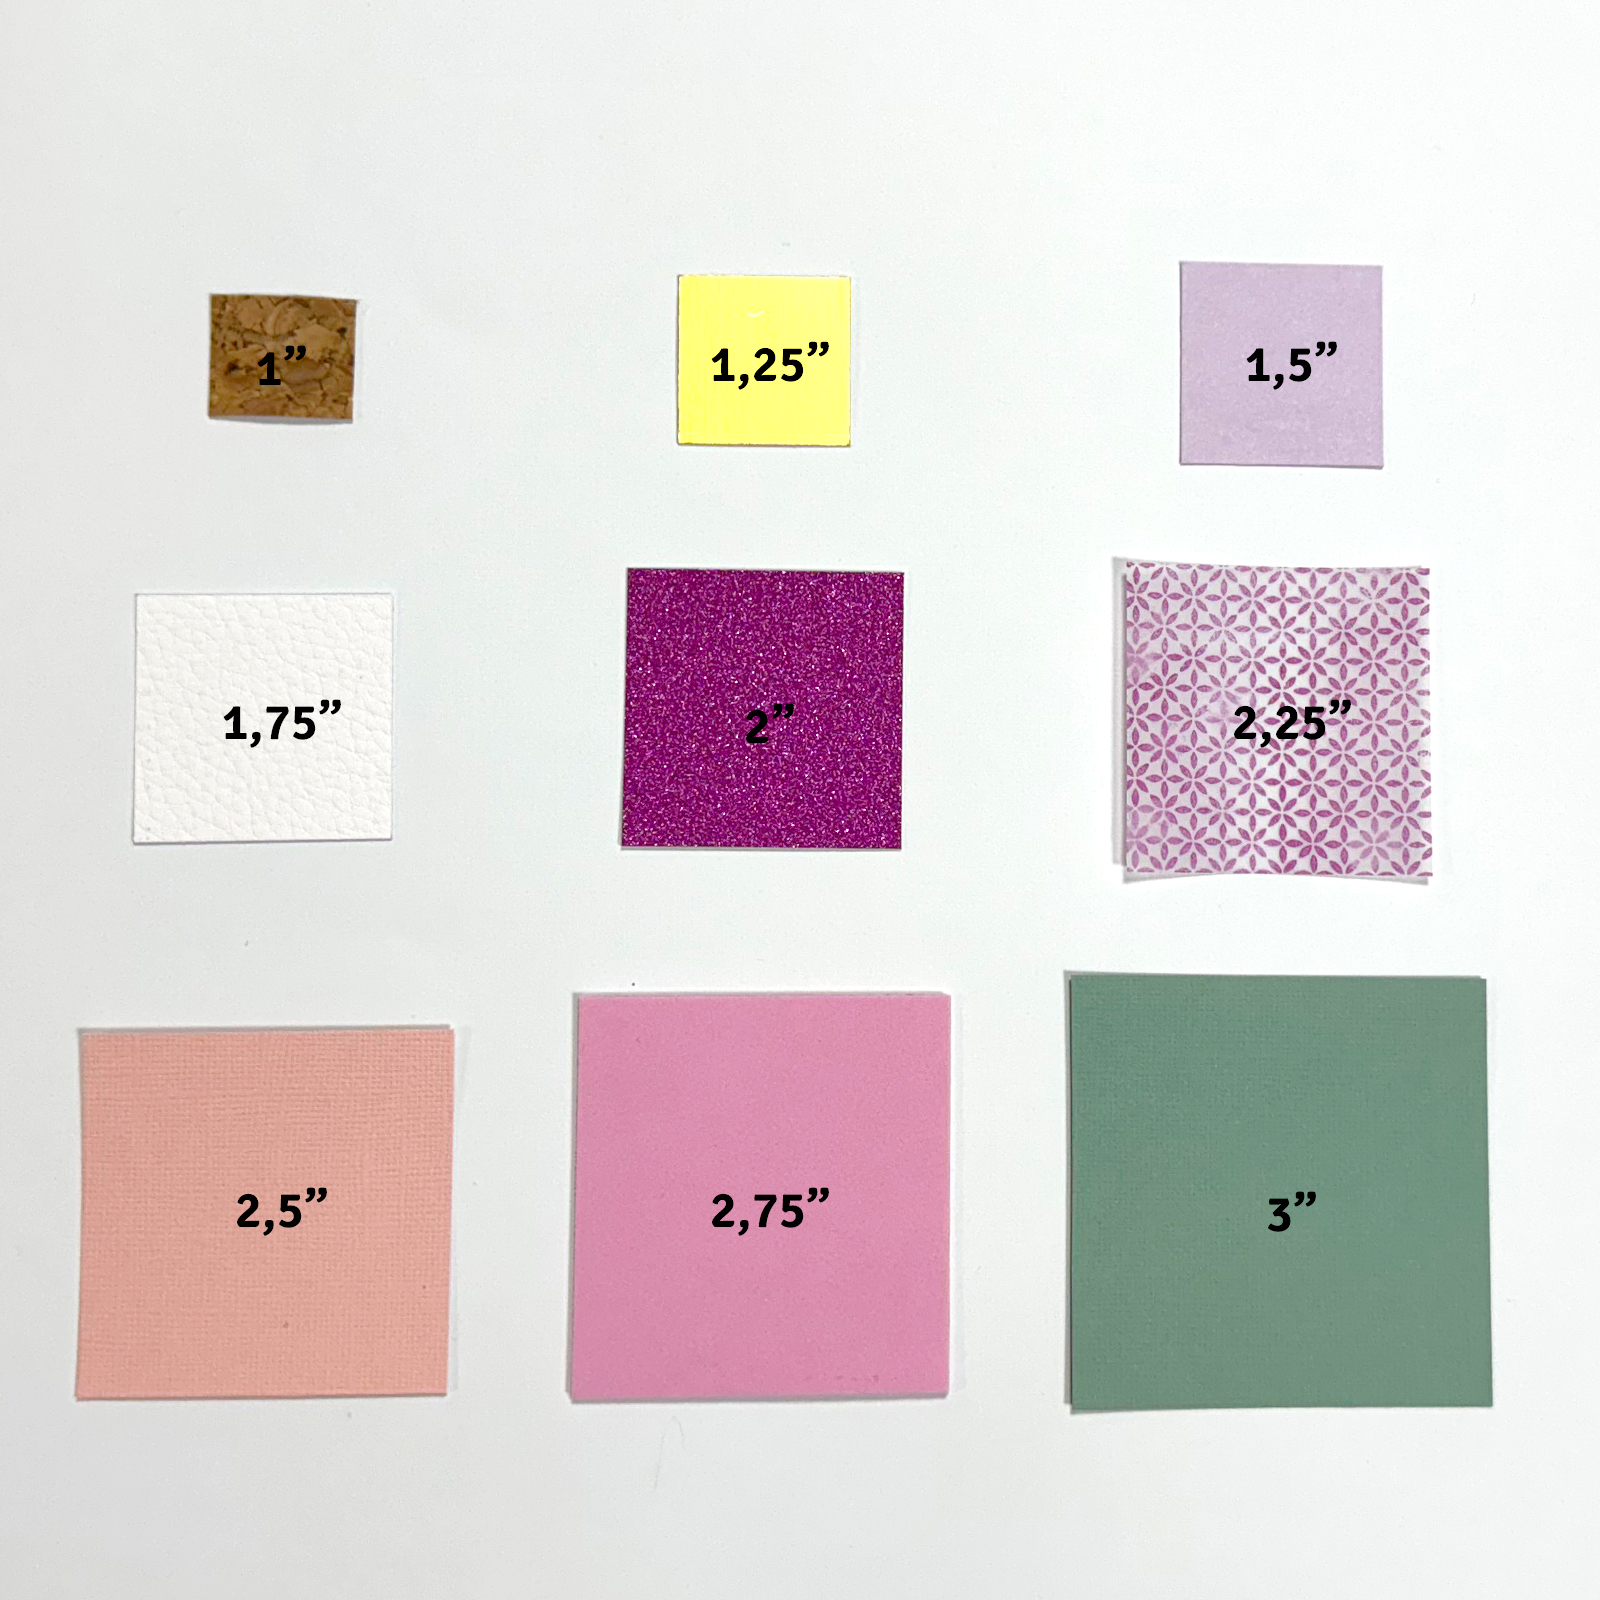
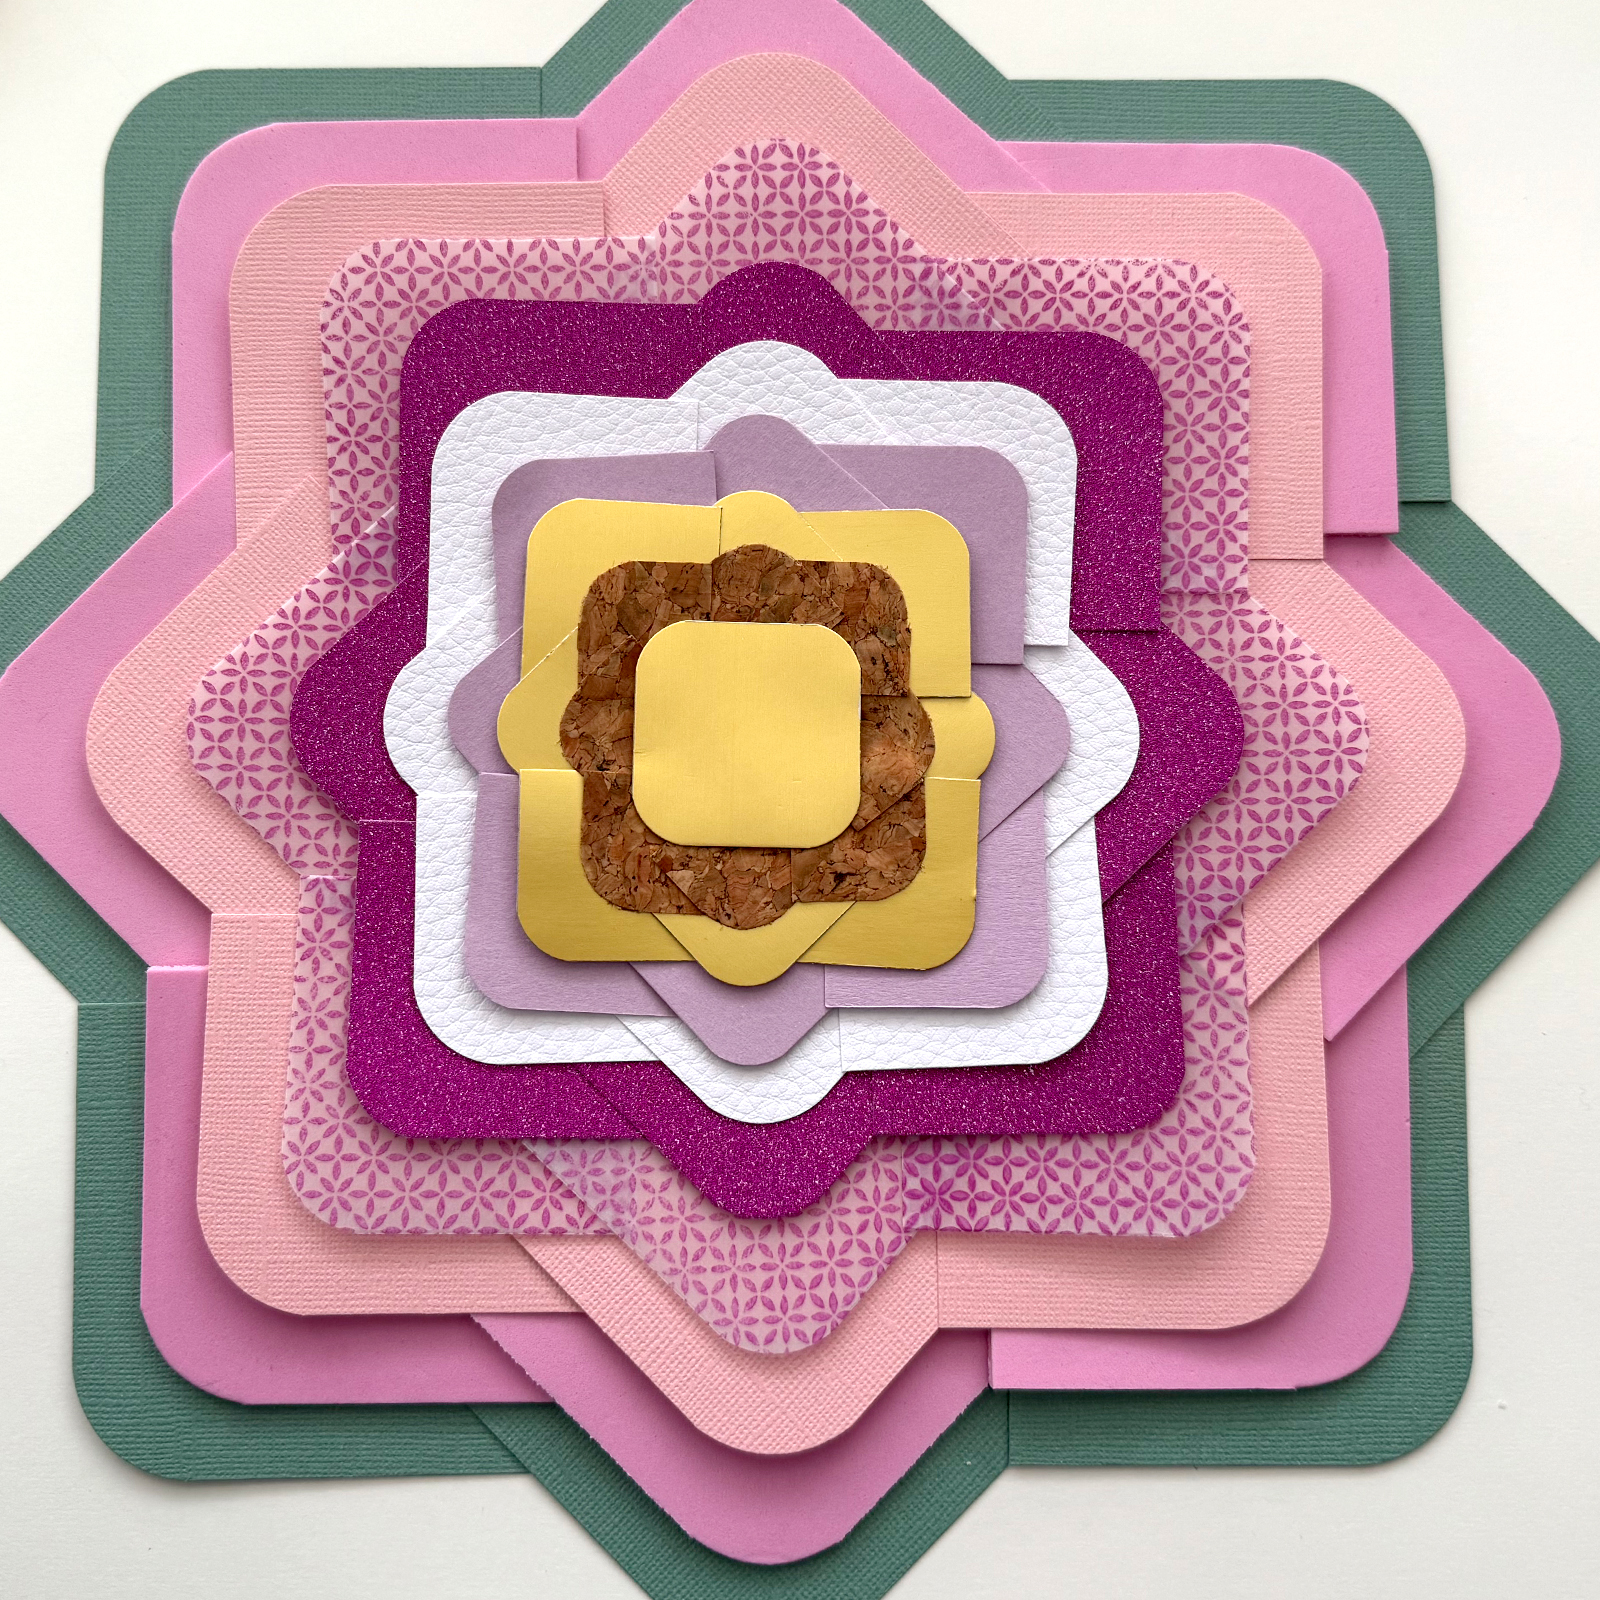
Gather different types of paper, including cardstock, foam, glitter, leather-like paper, foil, and translucent paper. Make sure you have a total of 9 different types and cut 8 squares of various sizes from each type, as indicated in the image.
3
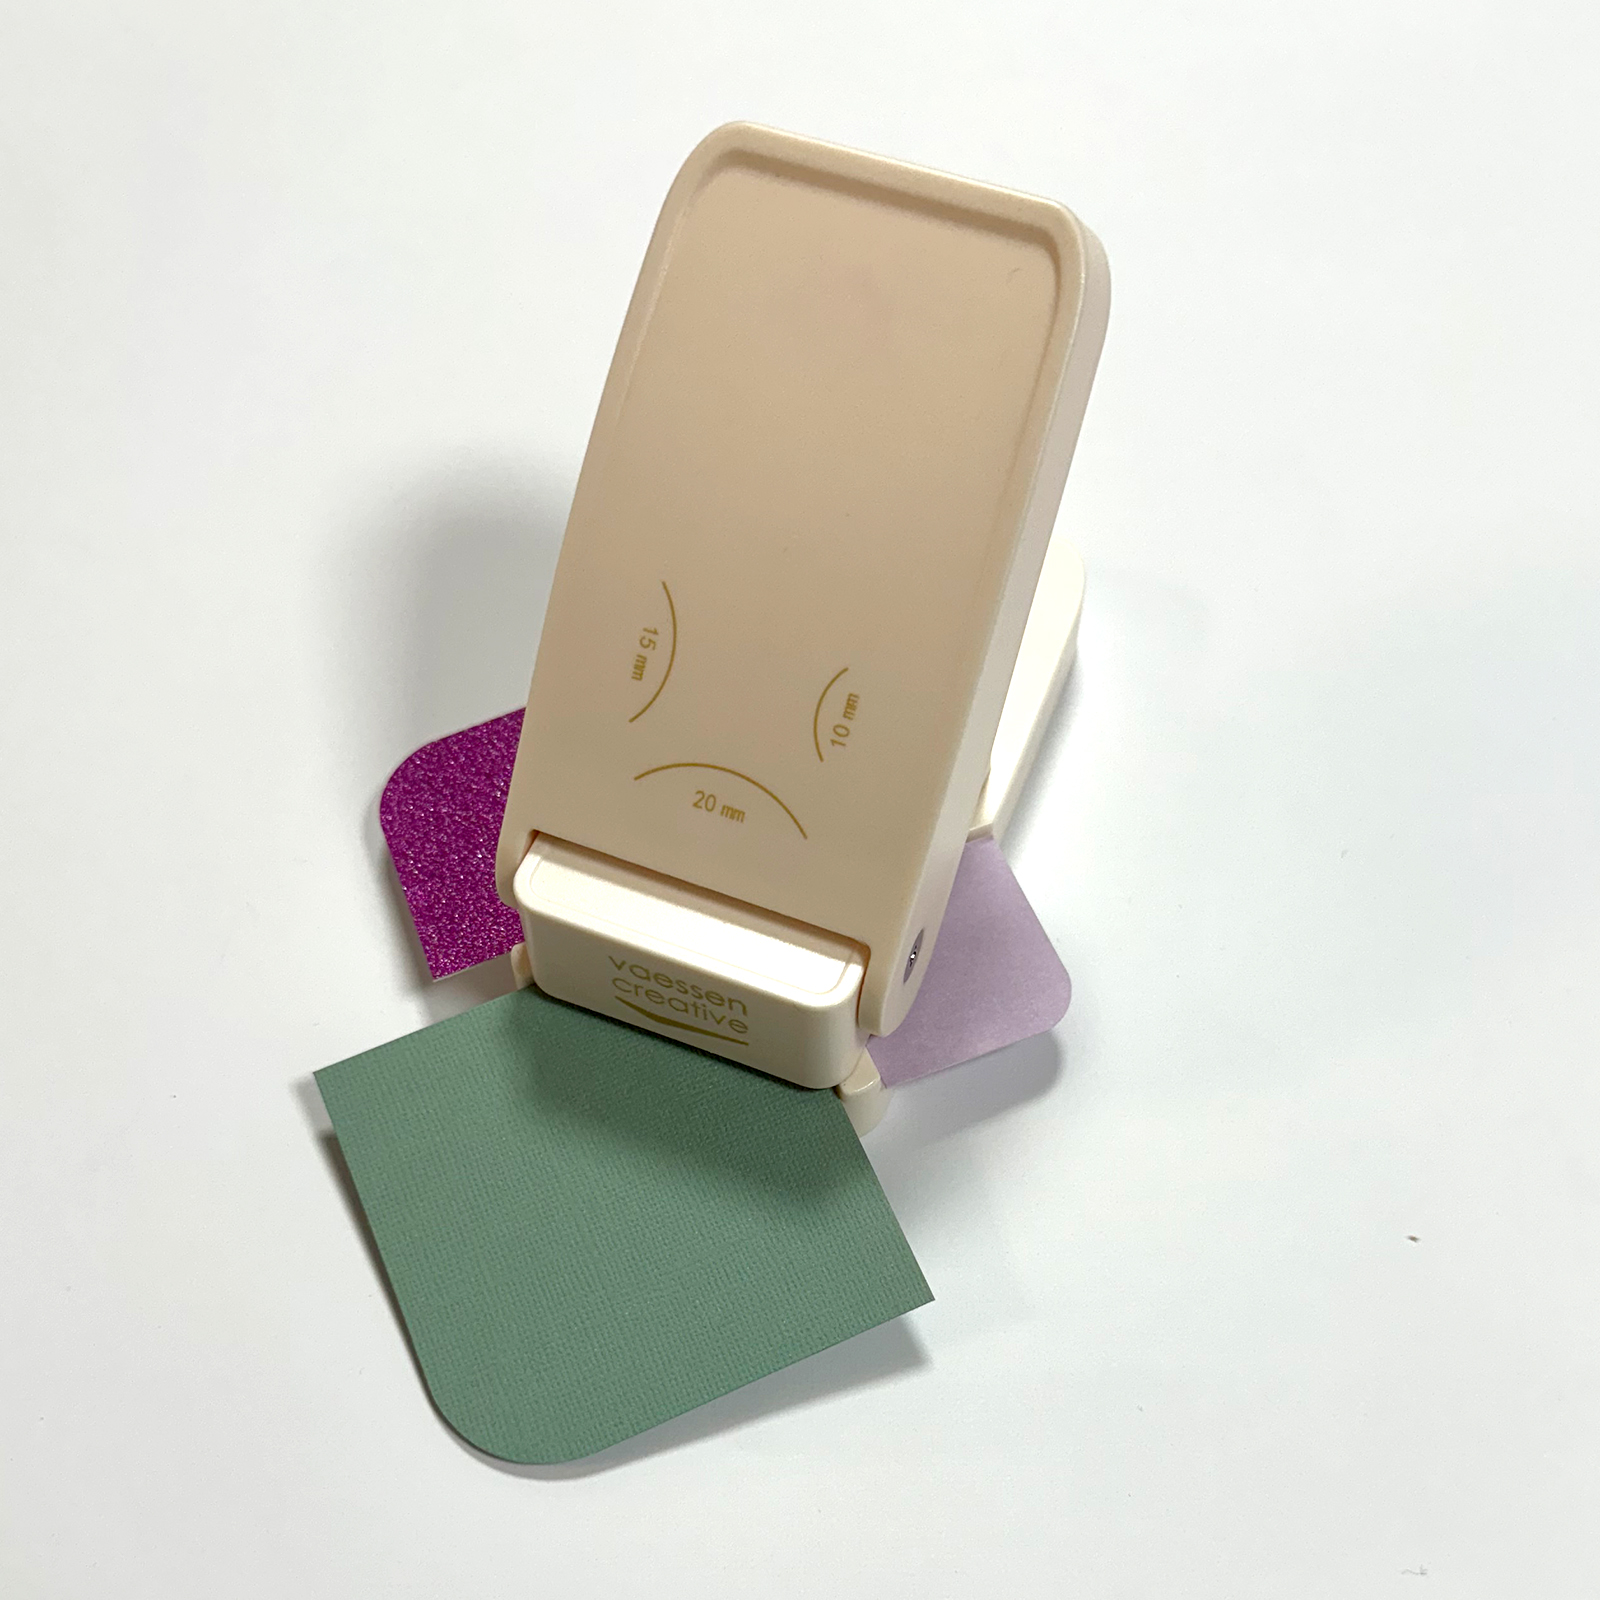
Use a 3-in-1 corner punch to punch two opposing corners of each square.
4
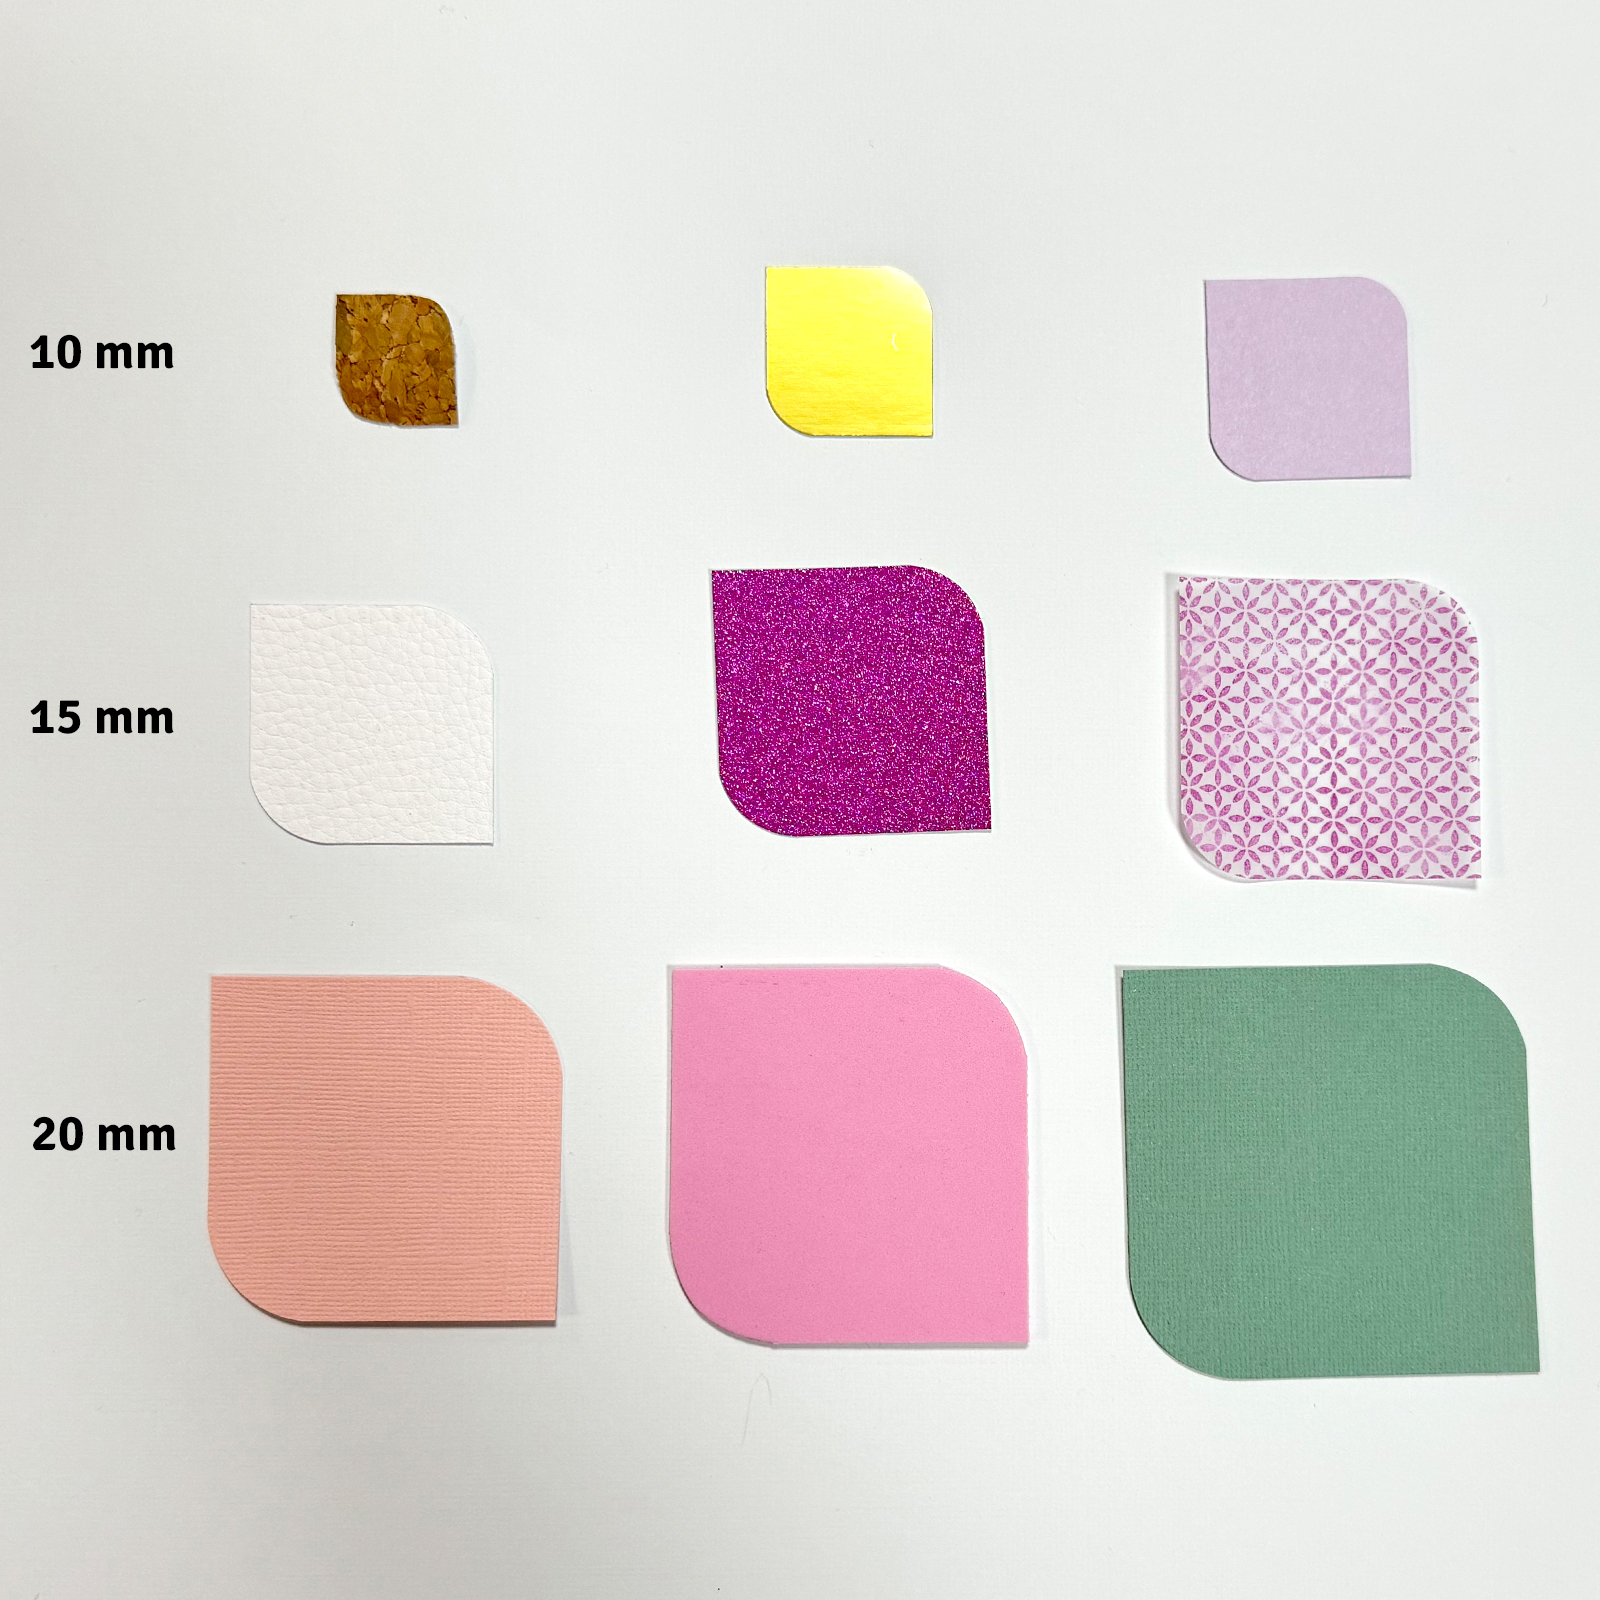
Adjust the size of the corner punch based on the paper's dimensions. Use the 10 mm angle for the three smallest squares, 15 mm for the medium-sized ones, and 20 mm for the largest ones.
5
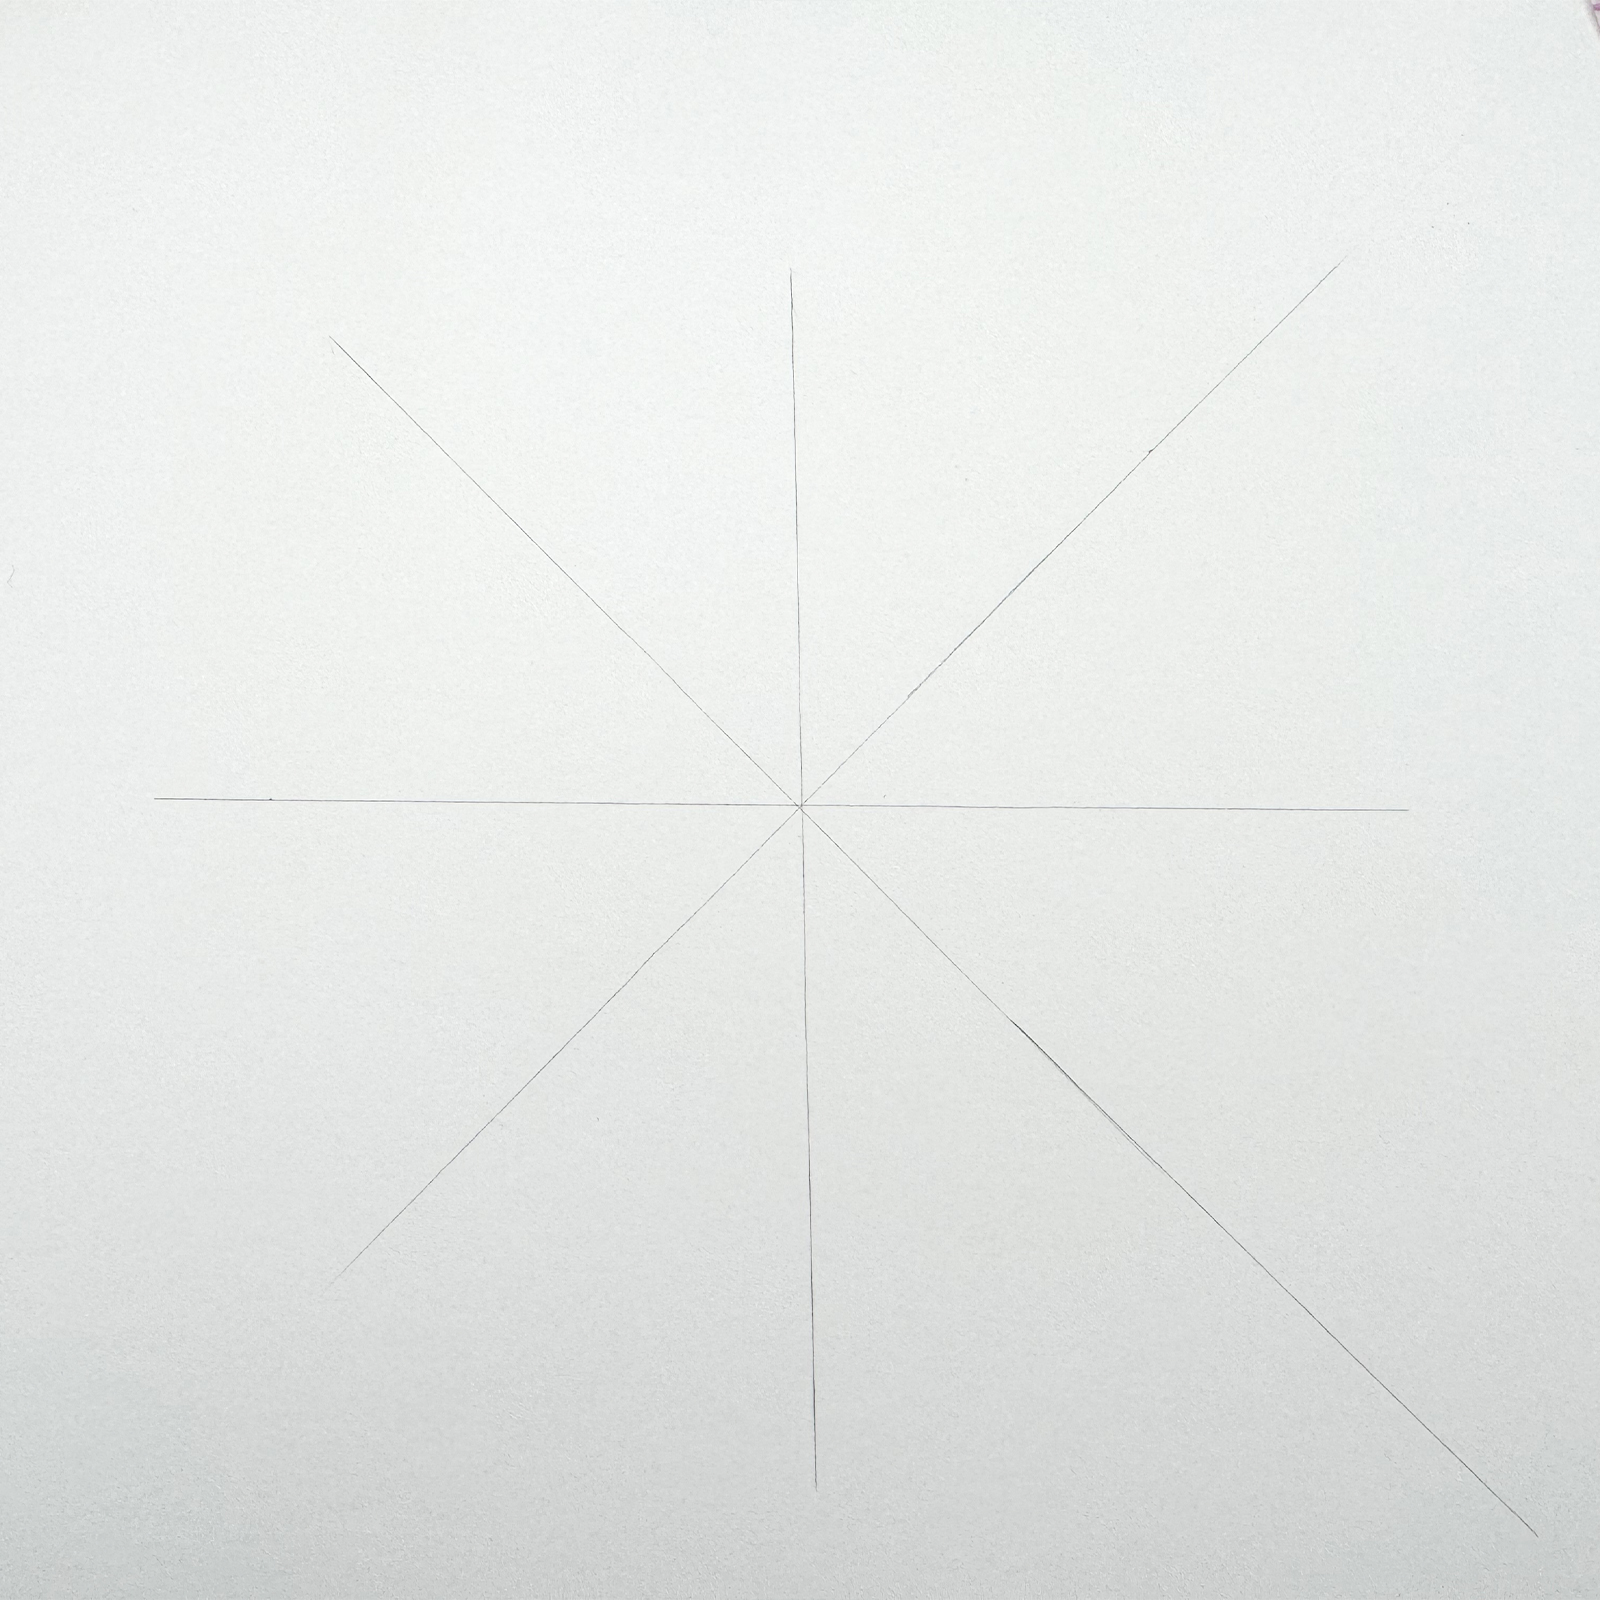
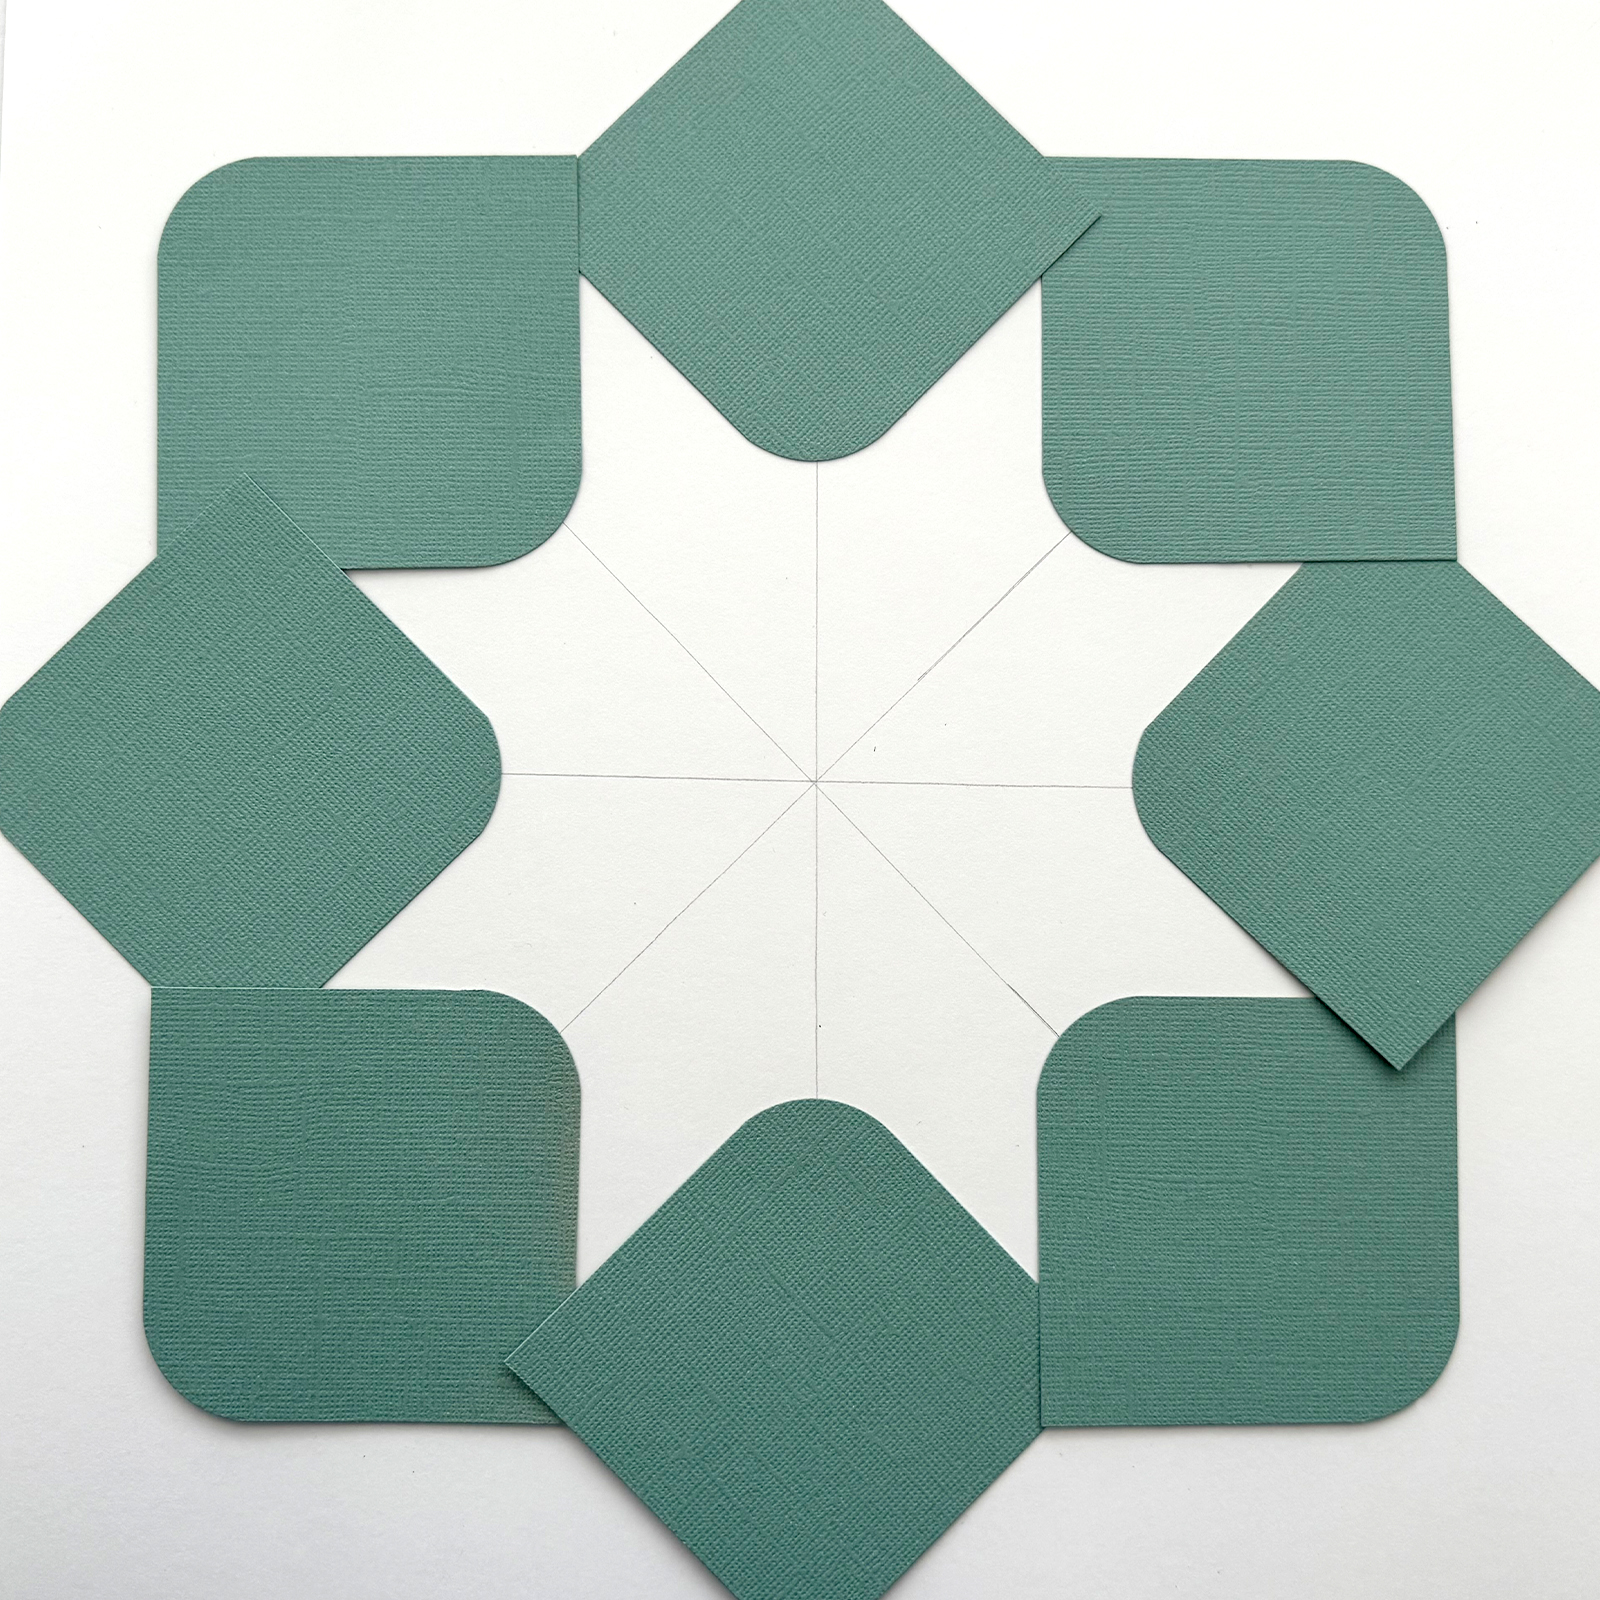
Take a sheet of cream-coloured cardstock and sketch the above shape on it to achieve an even distribution on the paper.
6
Begin by adhering the largest squares in a circle with the rounded corners facing outward.
7
Gradually add smaller circles of squares onto the cardboard.
8
To complete the shape, cut a 2 x 2-inch square and punch all four corners with the 10 mm punch. Affix this in the center.
9
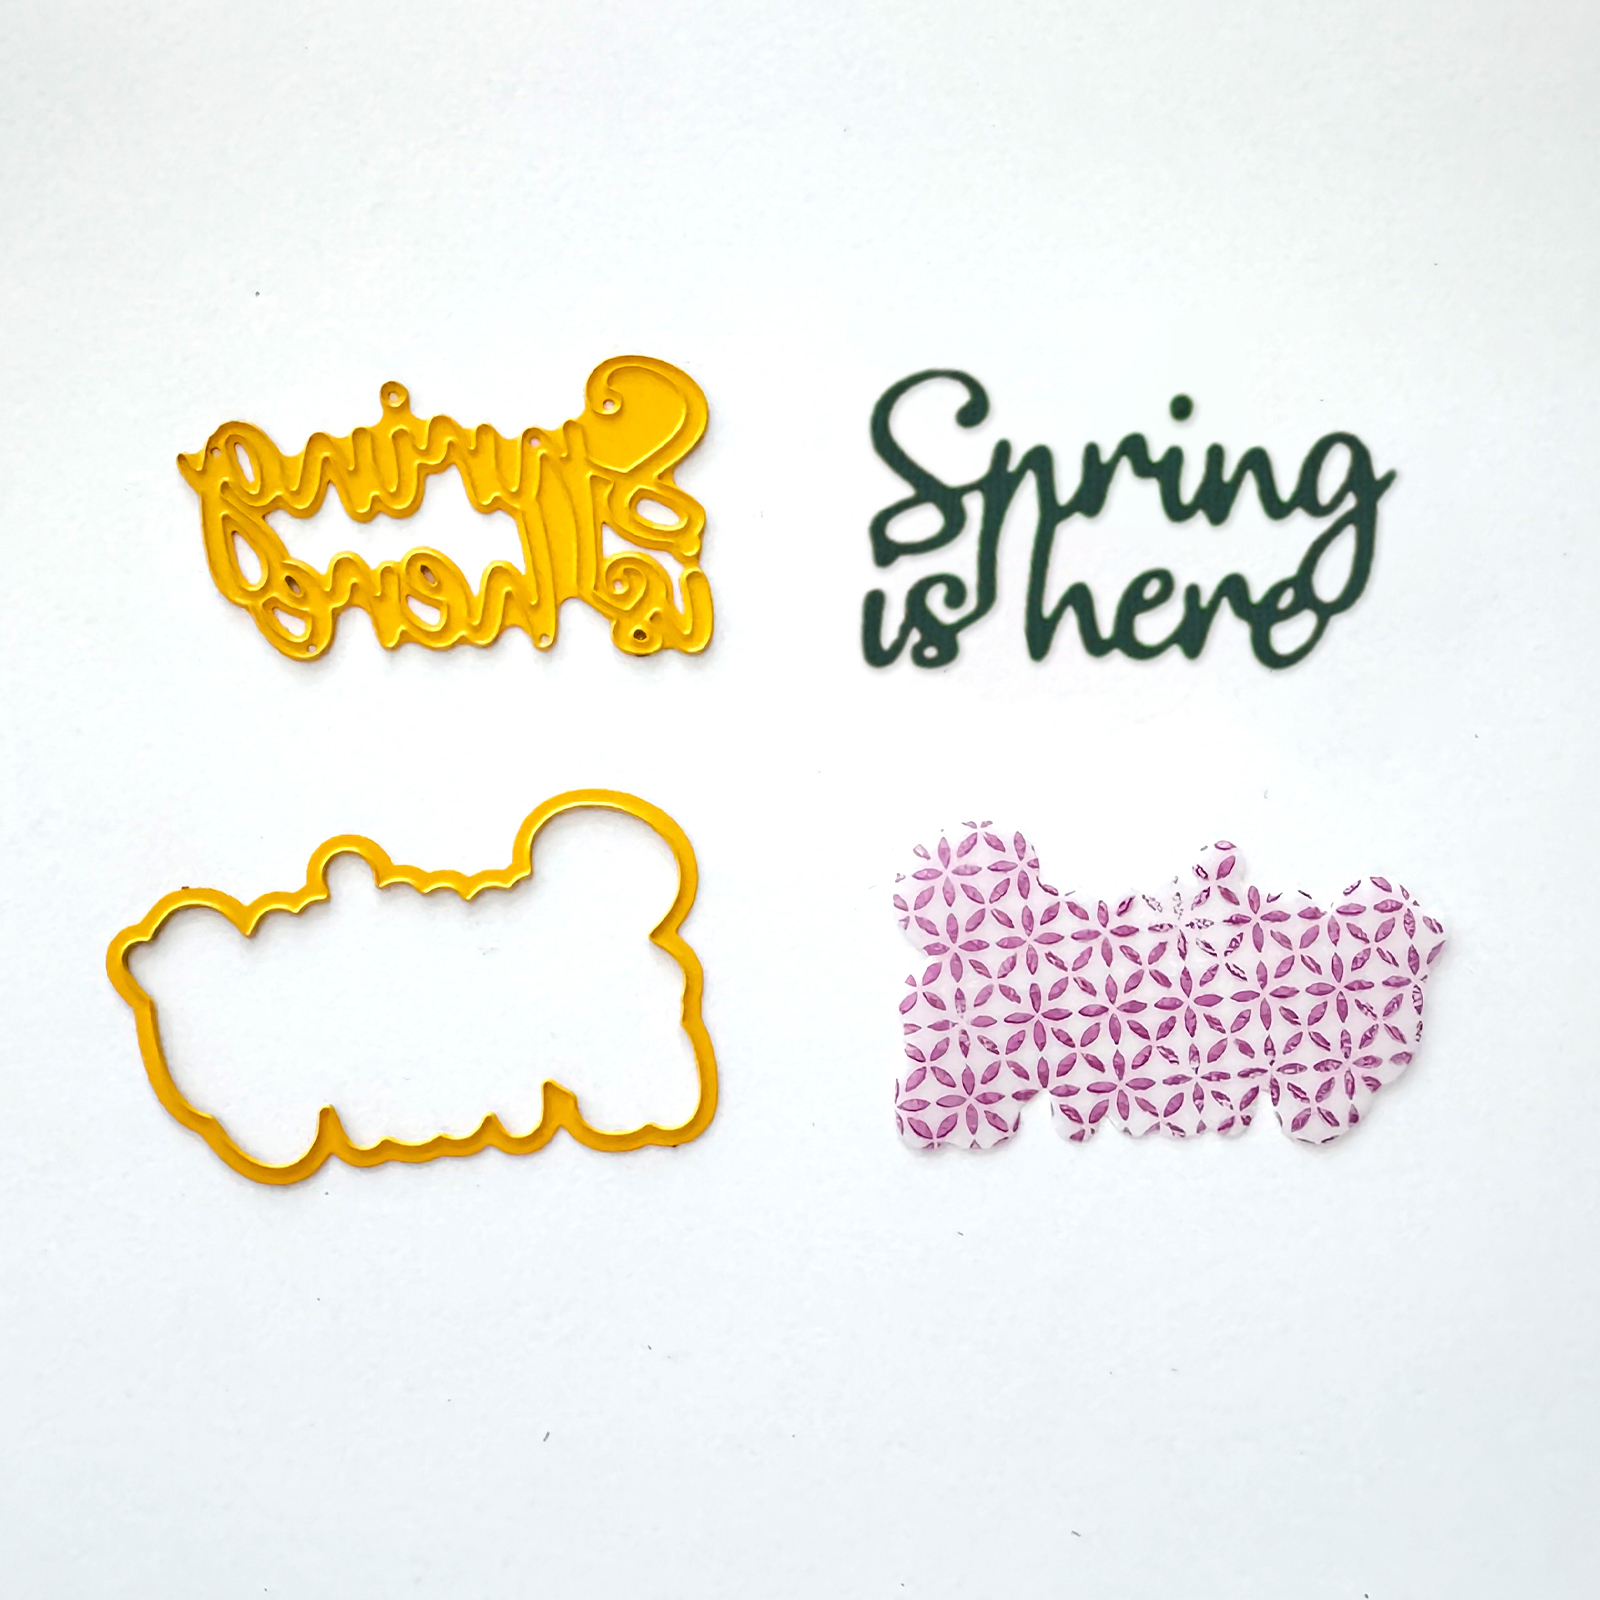
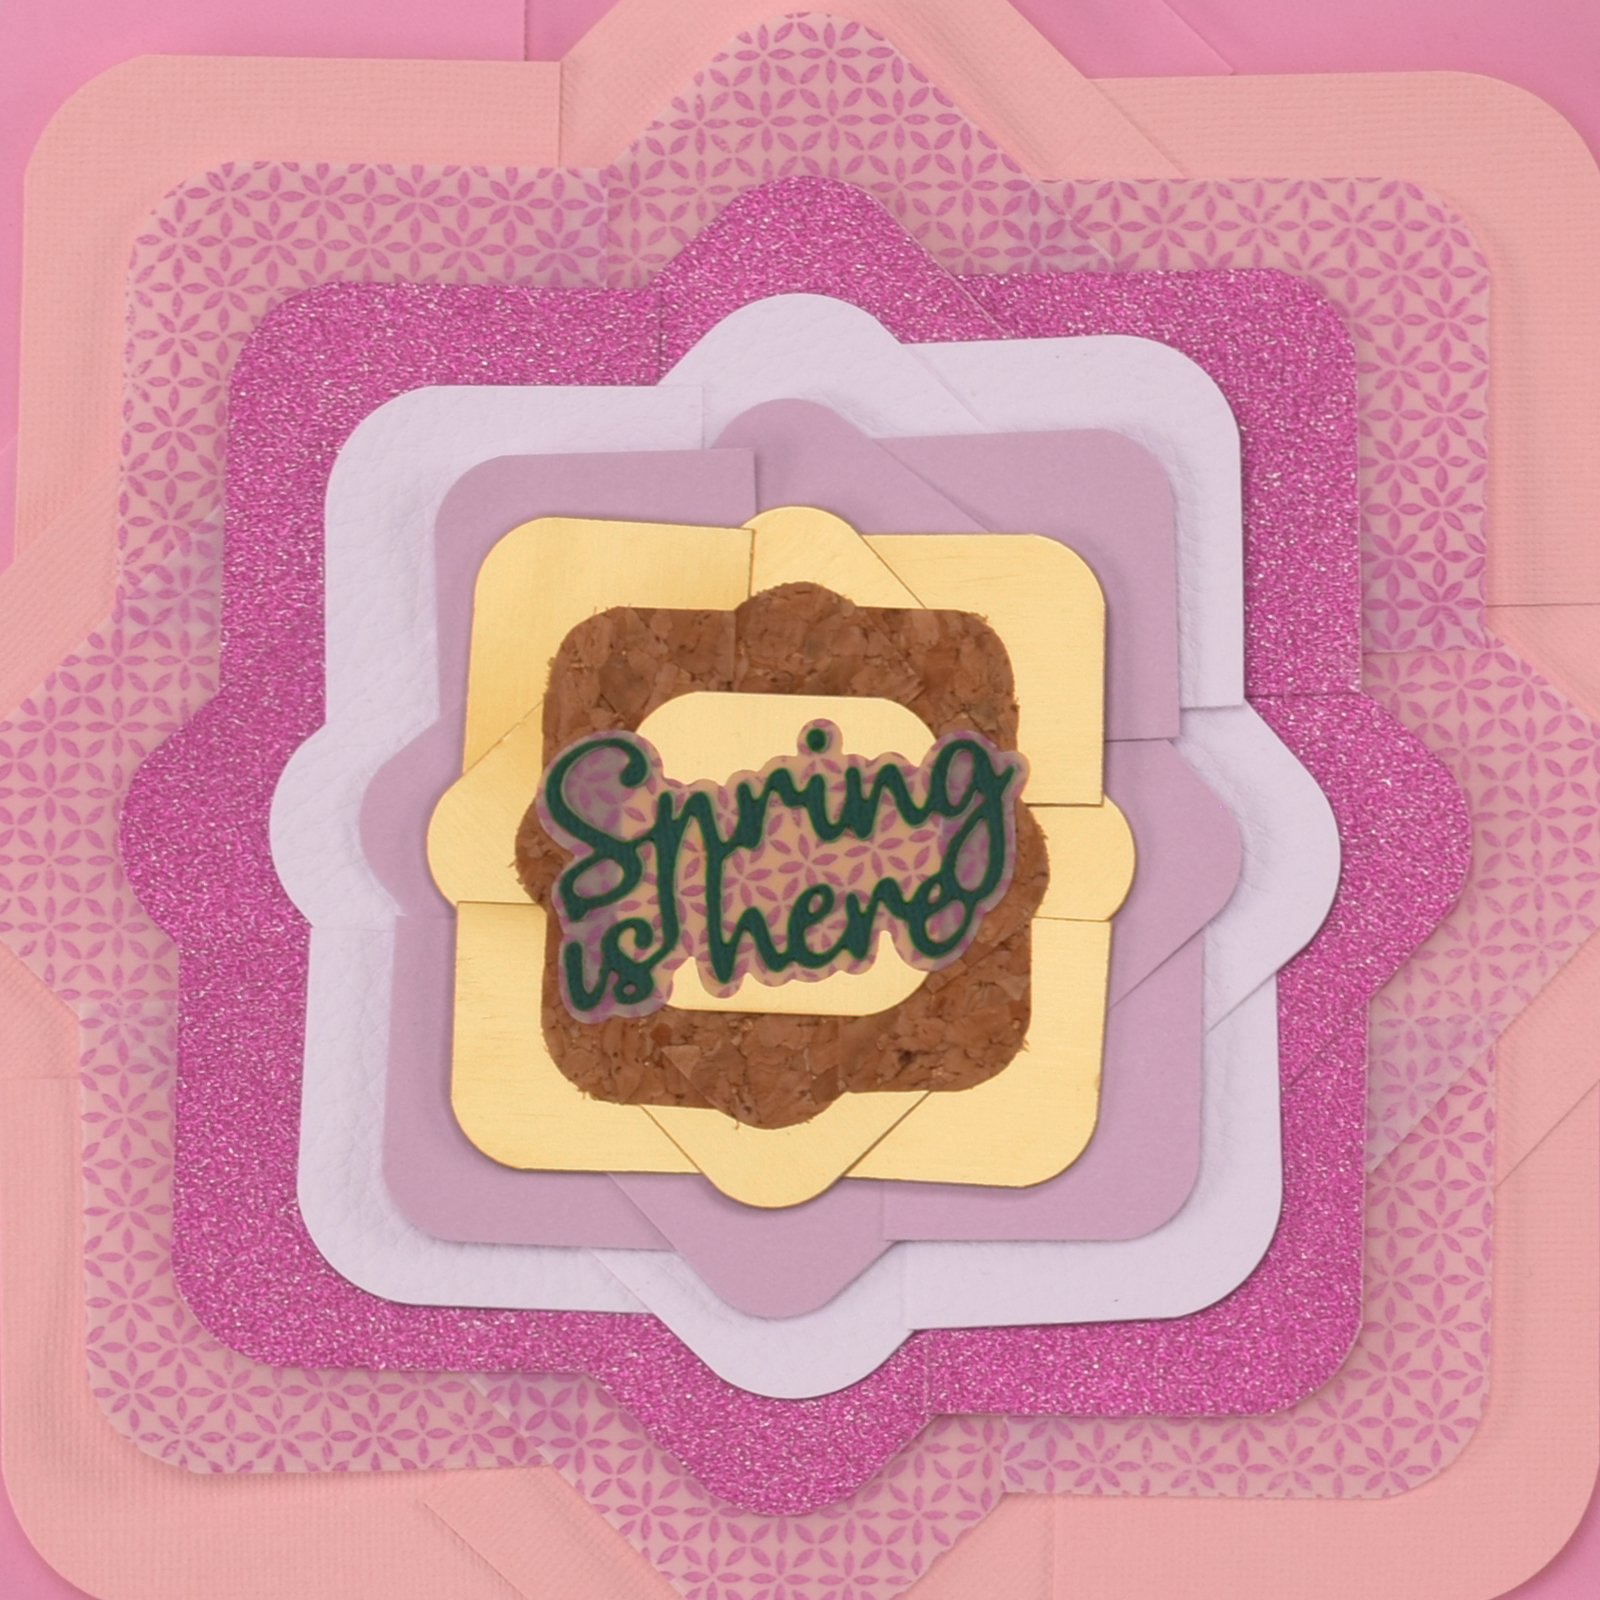
Use the cutting die "Spring is here" and cut the text and the background out of two different types of paper previously used.
10
Then, stack them together and adhere them to the created scrapbook page.