Lernen Sie mit dieser DIY-Anleitung, wie Sie eine geometrische Geschenkbox falten. Ideal für alle, die gerne mit Papier basteln und kleine Geschenke auf eine originelle und stilvolle Weise verpacken möchten.
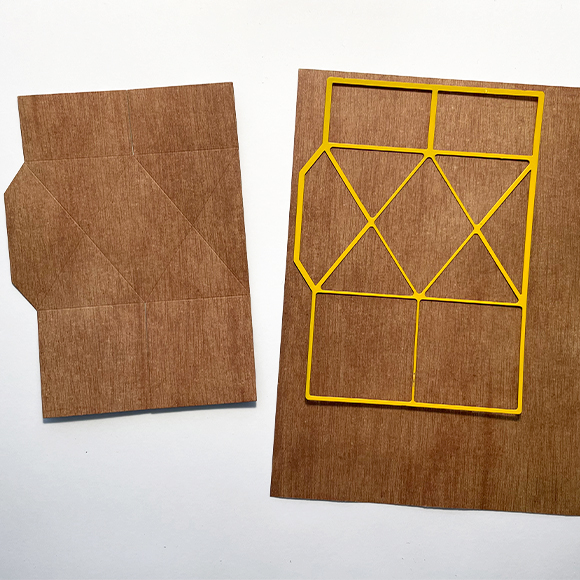
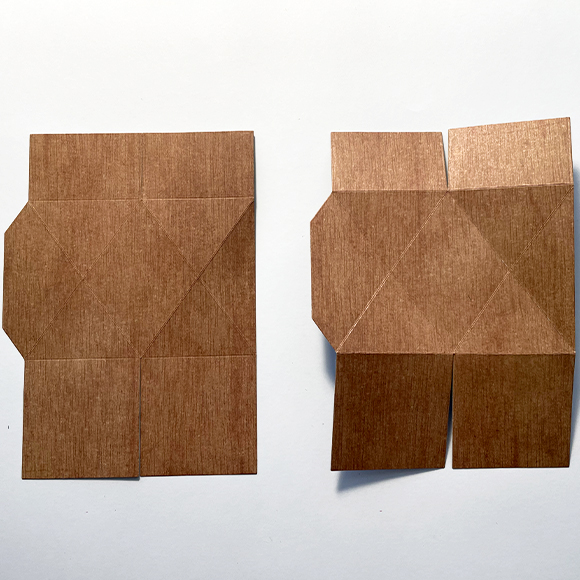
Nehmen Sie zwei A5-Blätter mit Holzoptik und prägen Sie mit einer Prägemaschine zweimal die Grundform der Box in das Papier.
2
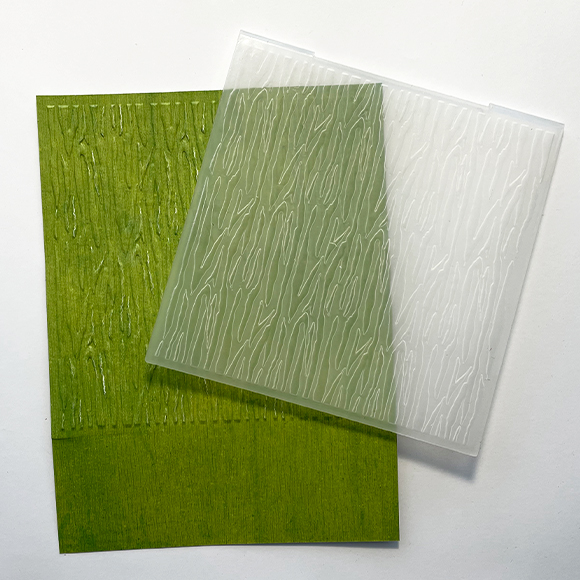
Nehmen Sie ein A5-Blatt mit Holzoptik in einer anderen Farbe, legen Sie es in einen Prägefolder und führen Sie diesen durch die Maschine.
3
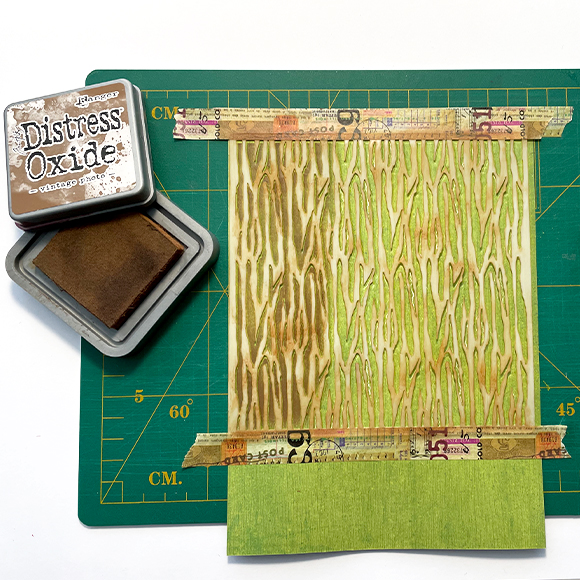
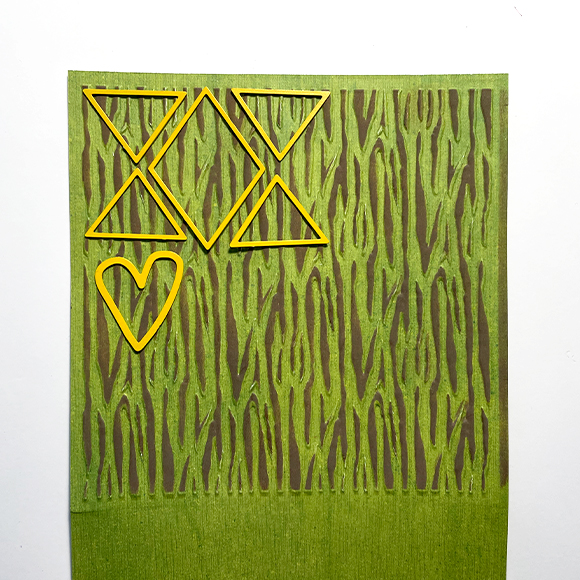
Kleben Sie das geprägte Papier mit Washi-Tape auf eine Arbeitsmatte und legen Sie die passende Schablone darüber. Tragen Sie anschließend mit einem Dauber oder Blending-Brush die Tinte auf die Schablone auf.
4
Nehmen Sie ein drittes Blatt mit Holzoptik in einer anderen Farbe und schneiden Sie daraus die großen Grundformen mit einer Stanz- und Prägemaschine aus.
5
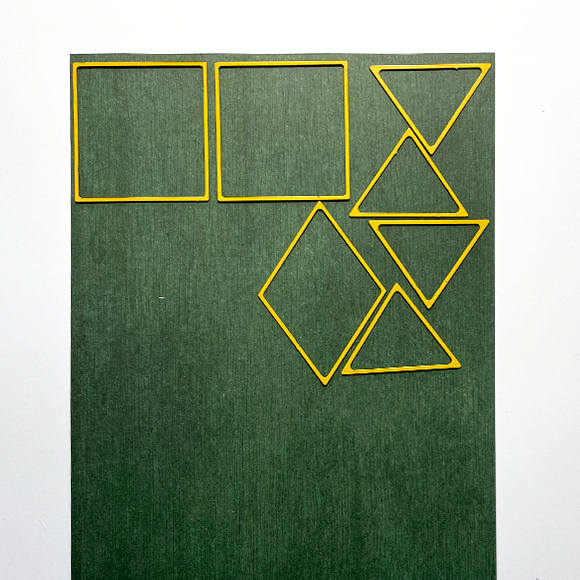
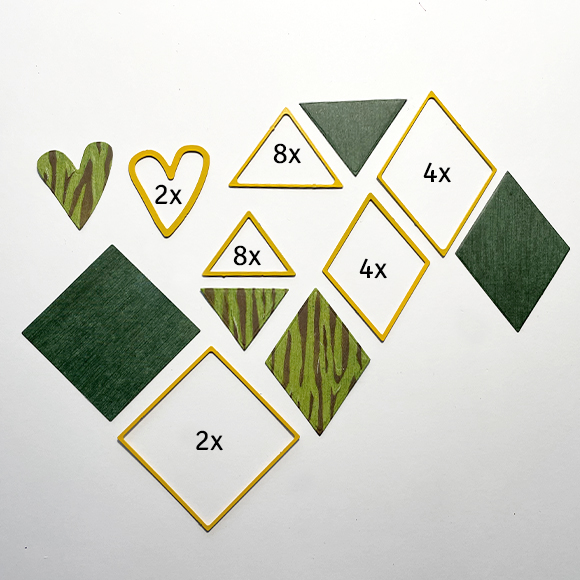
Nehmen Sie das geprägte Papier und schneiden Sie daraus die kleinen dekorativen Formen aus.
6
Wiederholen Sie dies entsprechend den angegebenen Zahlen auf dem Foto.
7
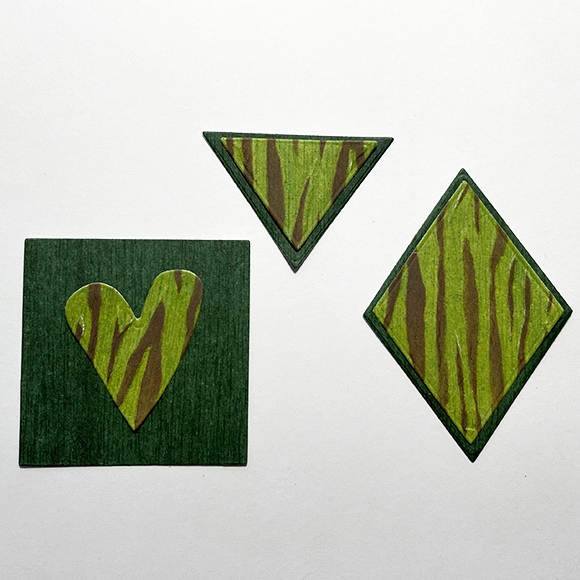
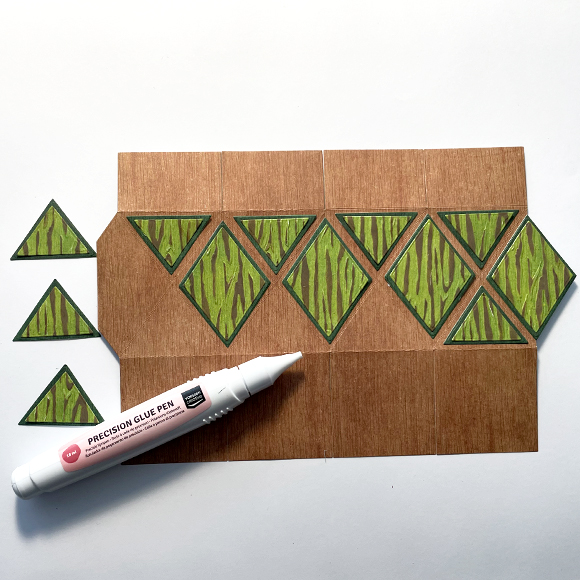
Kleben Sie anschließend die Dreiecke und Rauten aufeinander und befestigen Sie die Herzen auf den Quadraten.
8
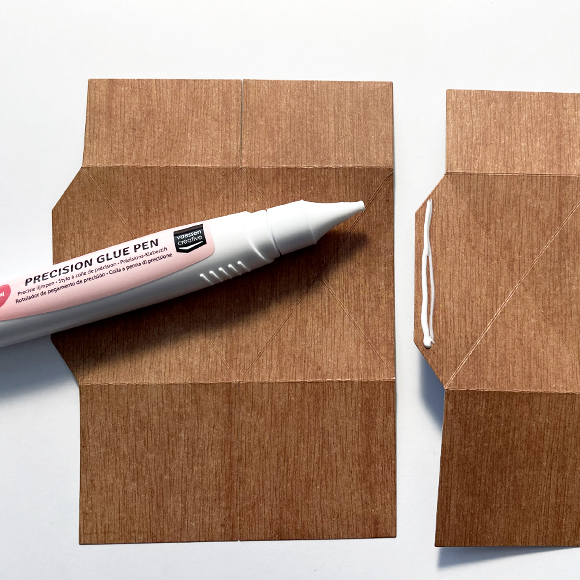
Falten Sie alle Falzlinien der beiden Papierbögen aus dem ersten Schritt.
9
Kleben Sie anschließend die beiden Formen zusammen.
10
Befestigen Sie die dekorativen Dreiecke und Rauten auf der Grundform der Box.
11
Es bleibt eine halbe Fläche für eine Raute frei, diese kleben Sie später beim Formen der Box fest.
12
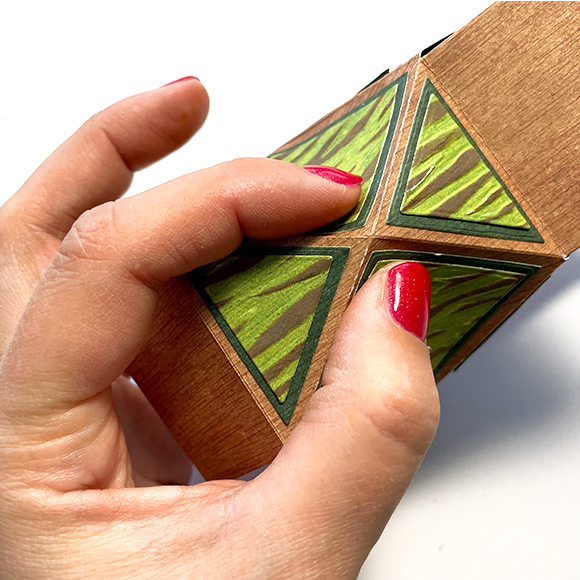
Falten Sie die Box zu und kleben Sie sie fest. Achten Sie darauf, alle Ecken gut zu falten.
13
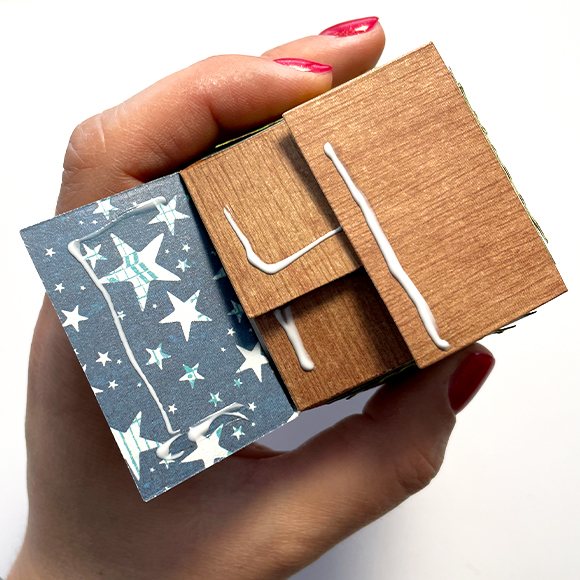
Kleben Sie die Laschen an der Unterseite der Box fest. Legen Sie ein Geschenk oder eine Überraschung in die Box und kleben Sie danach auch die Oberseite zu.
14
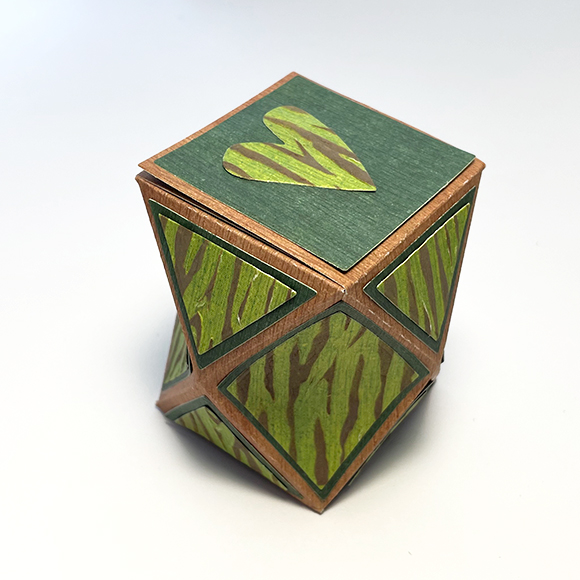
Zum Schluss kleben Sie die Quadrate mit Herzen auf die Ober- und Unterseite. Ihre geometrische Box ist jetzt fertig!